Rendering Animations
Your can access the Movie Settings window by selecting Animation > Make Movie. This window can also be accessed via the Render Settings dialog. The Movie Settings window appears as follows.
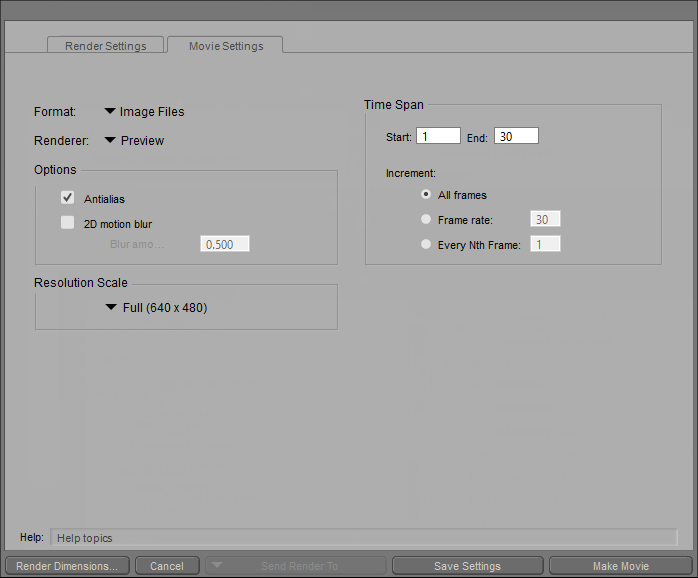
The Movie Settings dialog.
To use the Movie Settings window:
- Select your desired movie format using the Format pull-down menu. Your available options (for Mac and Windows, unless as noted) are:
- Image Files: This option creates an Image Sequence, which is a series of still images, one for each frame in your animation. For maximum value results and optimal quality, we recommend using the Image Files option to render your final movie, and then using a compositing tool for editing and post-production work.
- MP4 (H.264-AAC): The most commonly used format for distributing media online or by disc.
- iPhone: Three different resolutions, including iPhone Movie (480x320), iPhone 4 Movie (960x640) and iPhone 5 Movie (1136x640)
- iPad: Two different resolutions, including iPad Movie (1024x768) and iPad HD Movie (1280 x 1024), to save your files in M4V format.
H.264, iPhone, and iPad options may not be available on earlier versions of Windows.
- Android Movie: Two different resolutions, including Android Movie (480x360) and Android HD Movie (1280x1024).
- AVI (Windows Only): Three options are available in Windows for AVI format. Choose AVI (MJPEG) to produce an AVI file of any dimension, using a higher amount of compression (for streaming); choose AVI (DV) to produce a 720x480 pixel DV-quality AVI file. Choose AVI (Uncompressed) to produce an AVI file of any dimension, which will not be compressed.
AVI DV format will produce a 720 x 480 pixel AVI file, regardless of your render settings. If your project render settings are not set to the same aspect ratio, the movie will be stretched to fit within the 720x480 movie file.
- WMV/ASF (Windows Only): Three options appear for WMV/ASF format, for varying compression options: Medium Quality, High Quality, and Uncompressed.
WMV/ASF options use Windows Media Audio 10 and Windows Media Video 9.
WMV output presets are also available in Windows Vista, and Poser will write out valid WMV files if you choose the WMV/ASF preset. While Media Player for Windows Vista does not support WMV files, you will be able to play them in any third-party media player that runs under Windows Vista and has WMV support.
- PNG HD Movie (1280x1024) (Mac Only): Creates a high-quality movie with lossless compression.
- DV-NTSC (640x480) (Mac Only): Creates an NTSC-compatible video with 4:3 aspect ratio.
- MOV - (H.264-AAC) (Mac Only): Creates a compressed video suitable for streaming online.
- MOV - (pixlet-AAC) (Mac Only): Creates a high quality highly compressed video; however Apple Pixlet format is only playable on Macintosh systems running MacOS 10.3 or later.
- Select which renderer you wish to use for your animation using the Renderer pull-down menu. Your options are the FireFly, Sketch or Preview render engines. See Using The FireFly Render Engine Using the FireFly Render Engine for more information about the FireFly renderer, and The Sketch Designer for more information about the Sketch Designer renderer. The Preview renderer provides a quick draft-quality render of your movie.
- Under the Options section, check the appropriate checkboxes when available:
- Antialias: Antialiasing is available with the Preview render engine, to improve the quality of images in draft preview renders.
- 2D Motion Blur: This option provides realistic 2D motion blurring effects to images and animations rendered with the FireFly or Preview render engines. Use the Blur Amount value to customize the results of this effect.
- Click the Render Dimensions button in the lower left corner of the Movie Settings tab to open the Render Dimensions dialog. Enter the desired dimensions for your movie.
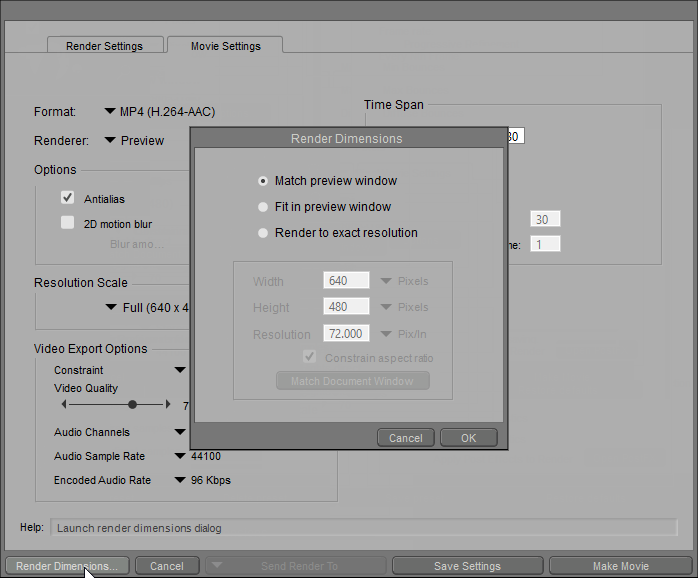
Setting Render Dimensions.
For more information about the Render Dimensions dialog, see Render Dimensions.
- Specify your desired export Resolution Scale. The Quick-Scale pop-up menu offers quick access to four different render scale options: Full Size, Half Size, Quarter Size, and Preview Size.
Note that the Resolution Scale feature is not intended to replace the Frame Size value, but rather is a tool for facilitating quick render previews, as the smaller scale render sizes require less time to calculate.
The production frame is determined by the aspect ratio resulting from the output width and height. You can set the production frame to be visible in the Document’s scene preview area, by selecting Display > Production Frame from the menu bar.
- Specify your Time Span settings:
- Range: Enter the start and end frame numbers for the portion of your animation that you wish to render in the Start and End boxes. This feature is useful if you wish to save a subset of the total animation. For example, if you create a 60-frame animation, you could opt to save a 15-frame movie beginning 35 frames into the total animation.
- Increment: Click the appropriate Increment radio button to specify how many frames to render in your movie output. Your choices are as follows:
- All Frames: Clicking the All Frames button will render all frames in the specified range, as defined by the movie’s frame rate.
- Frame Rate: Click the Frame Rate (number of frames per second) radio button to use the movie’s current output frame rate (as opposed to the actual frame rate of the Poser keyframe data) or specify your own. Enter the desired frame rate in the box, if you wish to specify a frame rate other than the rate defined for the document, lower numbers result in choppier animations but take less time to render. Higher numbers give smoother animations but require longer rendering times and take up more room on your hard drive. Please refer to for a listing of common frame rates.
- Every Nth Frame: Clicking this radio button allows you to render fewer frames, for fast preview purposes. For example, rendering every 2nd frame takes half the time as rendering every frame, and so on. Specify your desired “N” value in the box.
- Click the Make Movie button to open the Save dialog box, which allows you to browse for your desired folder, then click the Save button to save your new animation to the selected folder. Animation renders can take some time depending on your scene, animation settings, and computer, so please be patient.