Step 1: Create/Set Up a Cloth Simulator
The first step in creating dynamic cloth is creating and setting up a cloth simulator. You may have as many simulators as you wish in your scene, however each simulator requires system resources (RAM/CPU cycles) and increases rendering time.
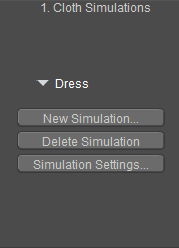
Cloth Simulations options.
Creating the Simulation
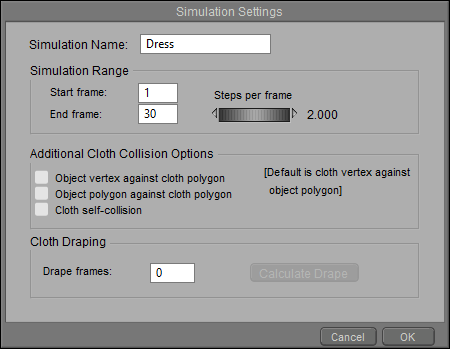
To create a simulator, click the New Simulation button in the Cloth Simulation area of the screen to open the Simulator Settings dialog.
Creating the Simulation.
The Simulator Settings dialog box has the following options:
- Simulation Name: Enter your desired name for the new simulator in the Simulation Name field. By default, simulators are numbered in the order they are created, e.g. Sim_1, Sim_2, etc.
- Simulation Range: You can either set the simulator to run throughout your entire animation or pick a set of frames during which the simulator is active by entering your desired frame numbers in the Start Frame and End Frame fields, respectively. Increasing the number of frames that a simulator is active requires greater amounts of system resources. During the frames prior to the start of a simulation, the cloth object will remain in its starting state. After the simulation ends, the cloth object will remain in its ending state for the rest of your animation. Additionally, the Steps per frame parameter dial controls the number of calculation steps per frame in order to smooth the cloth simulation. Increasing this value improves the simulation results but requires additional computing resources.
- Additional Cloth Collision Options: These checkboxes allow you to toggle the following additional collision detection options on and off. By default, collisions are calculated using cloth vertices against object polygons.
- Object Vertex against cloth polygon: Checking the Object Vertex against cloth polygon checkbox performs additional collision calculations using object vertices and cloth polygons, which helps eliminate tears or holes that may occur when an object collides with the cloth. Enabling this option slows the simulation.
- Object Polygon against cloth polygon: Checking the Object Polygon against cloth polygon checkbox performs additional collision calculations using object polygons and cloth polygons, which helps eliminate tears or holes that may occur when an object collides with the cloth. Enabling this option slows the simulation.
- Cloth self-collision: Checking the Cloth self collision checkbox allows a cloth to detect its own polygons during simulation, preventing (for example) a cape or a flag from passing through itself. Enabling this option slows the simulation.
- Cloth Draping: The Cloth Draping options are:
- Drape Frame: The Drape Frame value allows you to set the number of frames per object to settle the cloth.
- Calculate Drape: Clicking the Calculate Drape button calculates the cloth object’s draping behavior and caches the simulation. When calculating the simulation, cached drape settlings are added before beginning cloth simulations, meaning that the settled cloth drape is at frame 1 before the simulation begins.
When you have finished setting up the simulator options, click OK to accept your choices and create the simulator or Cancel to exit without creating the simulator.
The Cloth Simulation area has two other buttons:
- Delete Simulation: Simulation results are cached in a file during simulation computation, which Poser automatically loads to save time and resources. Clicking the Delete Simulation button deletes the cache contents.
- Simulation Settings: Clicking the Simulation Settings button reopens the Simulation Settings window, allowing you to alter your cloth simulator settings.
Think of a cloth simulator as an envelope supplying basic behavioral properties. You can have multiple cloth objects in each simulation and/or multiple simulations in each Poser scene. Each cloth object, however, can only belong to one simulation at a time. Increasing the number of simulations in a scene can add complexity and interest, but also requires increased computing resources.
The arrow at the top right of the Cloth Simulation area displays the currently selected simulator. Clicking this arrow opens a pull-down menu allowing you to select any of the cloth simulators in your scene for modification.