Installing Poser
You can find the most recent Poser 14 installers online at https://www.posersoftware.com/downloads.
Poser comes with several gigabytes of content that you will need to download and install separately You will need to enter your Poser 14 serial number to download the included content. You can also download and install the included content from the Poser library.
Installing Poser is a straightforward process. Before running the installer, be sure to save any work in progress and close all running applications, including virus-checking utilities and other “background” software. Having this “clean” environment will help the installation process proceed smoothly and will prevent any loss of data in the highly unlikely event of a problem. To install Poser, complete the following steps:
1.Click on the Poser installer (Install Poser 14.exe) to start the Installer.
2.Setup displays a screen that prompts you to select the language for installation. After choosing the language, click OK to continue.
3.If a previous installation is detected you will be prompted to uninstall it before continuing. Choose Yes (recommended) to continue with uninstalling (you will be asked to confirm again, by choosing Yes ).
If Poser is running while you attempt to run setup, the installer will prompt you to shut Poser down before you uninstall it.
4.After the previous version is uninstalled choose OK to continue with installation.
5.The Poser End User License Agreement (EULA) appears. Select I accept the agreement and click Next.
6.The Information screen appears. Review the Readme file. This file contains information that was too recent to be included in this manual. Please take a moment to read this file, as the changes outlined therein may affect how you install and/or use Poser. When you have finished reading the Readme file, click Next to proceed with the installation.
7.The Select Destination Location screen appears. Use this screen to select the installation path for the Poser executable. Select the destination location where you want to install Poser. You can use the default location or click the Browse button to specify another location, click Next to continue.
If Poser 14 has previously been installed on your computer, setup will notify you that the default destination folder already exists on your computer. Answer Yes to install to that location anyway.
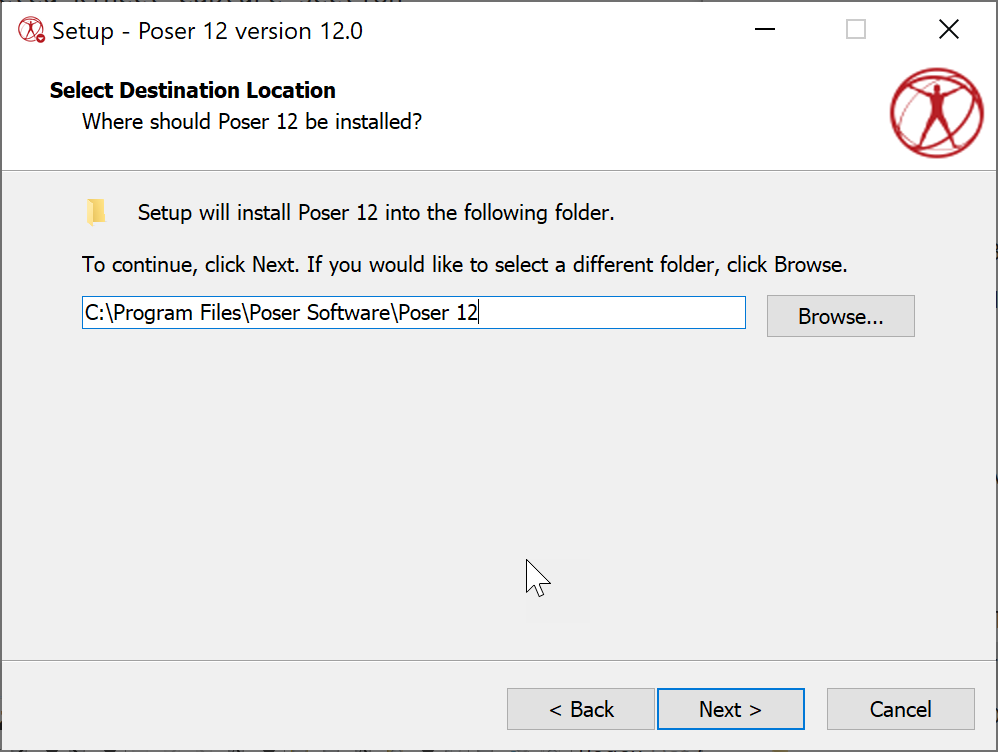
Choosing an installation location.
8.The Select Components screen appears. Choose the desired installation options from the drop-down menu:
•Full Installation: Most users choose the Full Installation option. This option performs the complete installation of Poser including all core content. The Queue Manager will also be installed.
•Queue Manager Only: Installs the Poser Queue Manager. Use this option for installing additional network rendering nodes. For more information see Installing Queue Manager
9.Click Next to continue to the Select Content Location screen. Select the location for the Poser content Runtime directory. Based on the descriptions below, select the location that works best for you and click Next.
•Shared Documents Directory: This is the default installation option. Files can be shared—useful in multi-user environment or when UAC is enabled on Windows Vista or later.
•Other Location: Specify the directory of your choice. This option is desirable if you want to install the Poser content to a different hard drive or folder name.
10.If you selected Other Location in the previous step, the Select Custom Content Location screen appears. Use this screen to choose the installation folder for your Poser content.
By default for Window 7 and later, setup installs the content folder beneath the Users > Public > Documents folder on the C: drive; however, you can browse to or enter the folder or hard drive of your choice. Click Next after you make your choice.
11.The Select Start Menu Folder screen will appear. You can use the default location or click the Browse button to specify another location. When you are finished, click Next.
12.Select Additional Tasks screen will appear. Options here allow you to remove, backup or reuse existing preference files that store information such as library runtimes, interface layouts, and other preferences. You can also enable the check boxes to create desktop icons for Poser and the Queue Manager. Click Next after you make your choices
13.Review your choices in the Ready to Install screen. Finally, click Install to install the Poser application. When they are finished installing, click Finished.
14.The final screen provides options to visit the Poser website and/or to launch Poser. After you make your selection, click Finish to exit the installer.
Some features of Poser require that you allow local network communication to operate. The features will not work if a personal firewall prevents local network communication.