Sending Jobs to the Queue Manager
Once the Queue Manager is running on your system and/or on another network node, you can send jobs to render in the Queue. Poser will launch the Queue Manager if it is not already running on your system. However, in order process a job in the Network Render Queue, the Queue Manager must be running on the remote system(s).
Using the Render Queue for a Single-Frame job
To send a single-frame job to the Render Queue, first select the FireFly tab in the Render Settings dialog Then, you can do one of the following:
From the Main Menu, select Render> Render In Queue.
Click the Send Render To button in the The current frame with the current FireFly Render Engine settings will become the rendered job. Name the job, select a file format from the pull-down menu, and specify the output location. Click Save. This will submit the job to the Queue Manager and add the job to the job list. Sending a job to the Queue launches the Queue Manager if it is not already running.
When you send a single frame render to the Queue, the filename that you enter will be appended by the frame number that you are rendering. For example, if your project is on frame 30 when you render a still image, the image that is rendered in the Queue will be named (filename)_0030. Previous renders of the same frame will be overwritten.
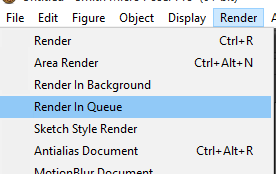
The Render in Queue command creates a render job.
Using the Render Queue for a Multi-Frame Job
To send a multi-frame job to the render queue, from the Main Menu, select Animation> Make Movie. Choose your images path and filename as discussed in Rendering Animations.
Once the movie settings have been defined they cannot be changed, and the job will retain those properties when sent to the Render Queue.
Then choose one of the following options:
To render images and encode the movie immediately:
Click the Send Render To button and choose Queue.
In the Make Movie Options section, check Auto Make Movie.
Then click the Encode Images button at the bottom of the make movie dialog.
To render images only, and create the movie later:
Click the Send Render To button and choose Queue.
Click Save Settings to save the render settings in the Make Movie dialog. After you close the Make Movie dialog, choose File> Save to save your current project file before you close it.
Click the Render Images button in the Make Movie Options section. The images will be created in the location specified.
When you later reopen the Make Movie dialog, verify that the images path points to the image files that you previously rendered. Then click the Encode Images button.
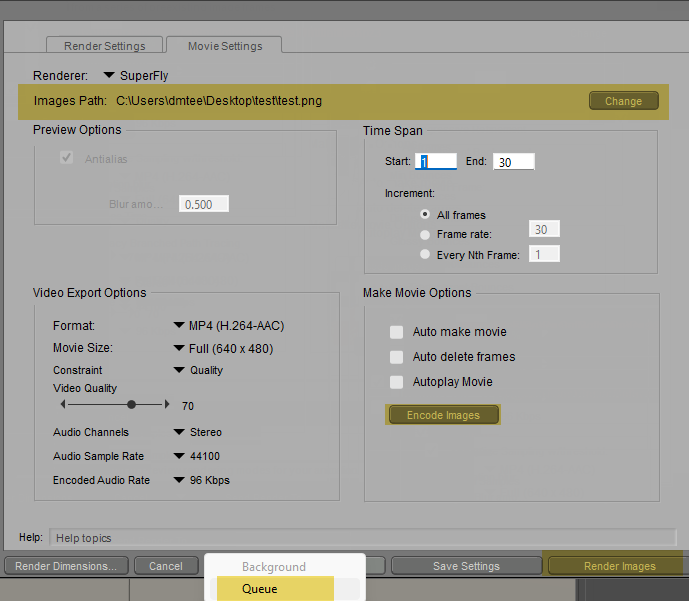
The Movie Settings tab in the Render dialog.
Once you have submitted a job to the Queue, you can begin editing, start another project in Poser, or start working in another application.