Using Constraint Channels
Constraint channels allow you to animate one object based on the position of another object. To explain, visualize a scene where a football is being tossed to a football player, and then he catches it and runs with it. If you create this type of scene in Poser, you can use a constraint channel to help with this animation. The figure’s hand can be a target for the football. You animate the pass of the football, and when the football gets close to the catcher you can set the value of the Constraint object to 1 so that the ball moves with the figure’s hand.
You can delete the Constraint channel and the Constraint object will still appear in the scene and act as a grouping object, as described in Grouping Objects.
Here is a simple example to illustrate how this works. Create a simple scene that has three primitive props, such as a box, a bowl, and a ball (or similar).
With one of the props selected (the box in this example), choose Object > Add Constraint. The Add Constraint dialog appears and prompts you to select a constraint target. You can then select the ball as the target.
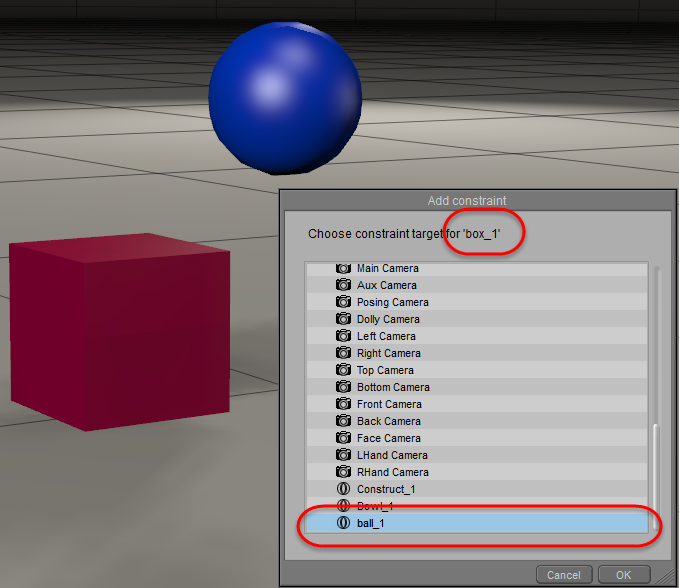
Choose a Constraint target from the Add Constraint dialog.
After you click OK, you will see that the box moves to the same position held by the ball, so that they are now in the same space. A Constraint dial appears in the Parameters Palette, and is set to 1. When you move this dial back toward the 0 value, you will see the box move back toward its original position.
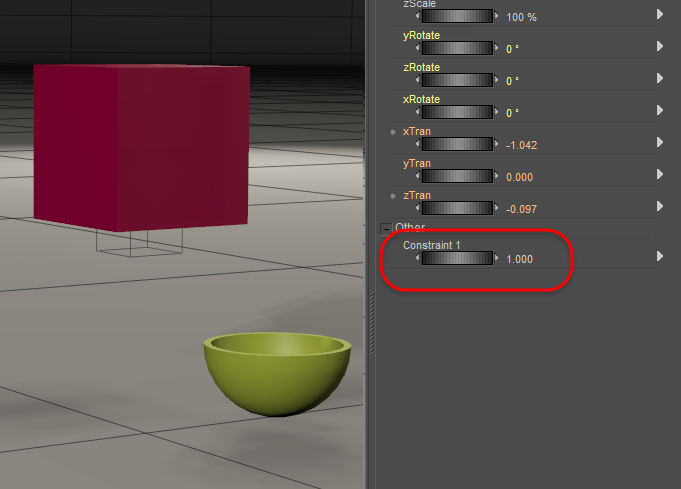
The box moves to the same space as the ball when the Constraint dial is set to 1.

The box moves toward its original position when the Constraint object value is between 0 and 1.
A wireframe box appears at the origin of the ball (the target), but may be hidden within the target object. This wireframe box is a container that will not render in your scene, but it assists in animation. The Hierarchy Editor will show this box as Constraint Grouping n (where n is a numerical value automatically assigned in Poser) and it will appear as a child to the ball.
Now, to see how a constraint channel works, move the Constraint parameter dial back toward 1, so that the box moves closer to the ball. Then move the ball (not the Constraint object) with the editing tools. You will notice that the box follows the ball. The amount of movement between the two objects is determined by the value set by the Constraint parameter dial.
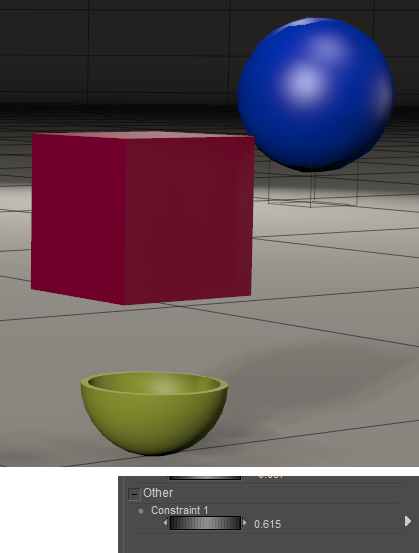
When you move the ball, the box follows it, with the amount of movement dependent on the Constraint value.
You can add more than one constraint object. For example, you can select the box and assign the bowl as a second constrain target. An additional Constraint dial appears in the Parameters window (and also in the Hierarchy window). When an object has two Constraint targets, it works as follows:
- If both Constraint 1 and Constraint 2 for the box are set to 1, the box will be positioned according to Constraint 2.
- If Constraint 1 is set to 0, and Constraint 2 is set to 1, the box will be positioned according to Constraint 2.
- If Constraint 1 is set to 1, and Constraint 2 is set to 0, the box will be positioned according to Constraint 1.
- If both Constraint 1 and Constraint 2 are set to values other than 0 or 1, the box will be positioned in relation to both.
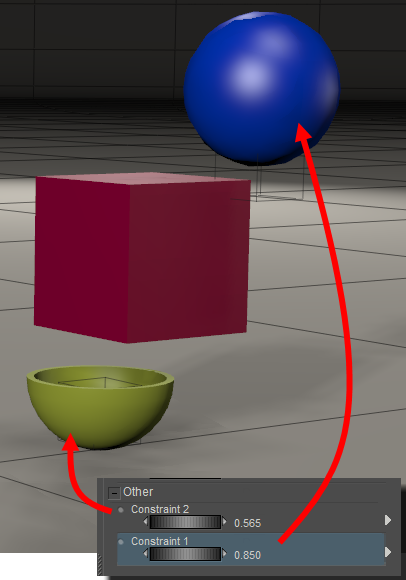
When an object has two constraint targets, set each to a value between 0 and 1 for both to have effect.