Transferring Zones and Weight Maps to Clothing
In earlier versions of Poser, content developers used information from the CR2 of an existing figure as a start point for their clothing. If an existing character has only spherical or falloff zones this method can still be used.
However, when weight maps are used to determine how a joint bends (either solely, or in addition to falloff zones), the weight map information is baked into the figure’s geometry. Weight maps are based off of vertices and index arrays that usually will not have a geometry counterpart in the clothing.
The Setup Room allows you to apply the rigging of a character to a grouped or ungrouped clothing OBJ. In the process, it will also transfer any spherical or capsule falloff zones. It will also analyze the vertices and index arrays in the character, and use that information to generate similar weight maps for the clothing geometry.
The steps to do this are fairly simple:
- Choose File > Import > Wavefront OBJ. Select the clothing object that you want to rig. This object can be pre-grouped in your modeling application, or it can be ungrouped.
- The Import Options dialog appears. In most cases, clothing is modeled around a character that is in its default position, and exported at or converted to the proper scale for Poser. If this is the case, you should uncheck all of the import options as shown below. Then press OK to continue.
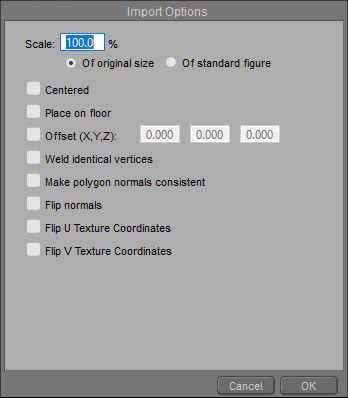
Uncheck all options in the Import Options dialog if your model is scaled and positioned properly.
- A dialog prompts you to locate the OBJ file that you want to import. After you select the object, click Open. The OBJ file will appear in your scene.
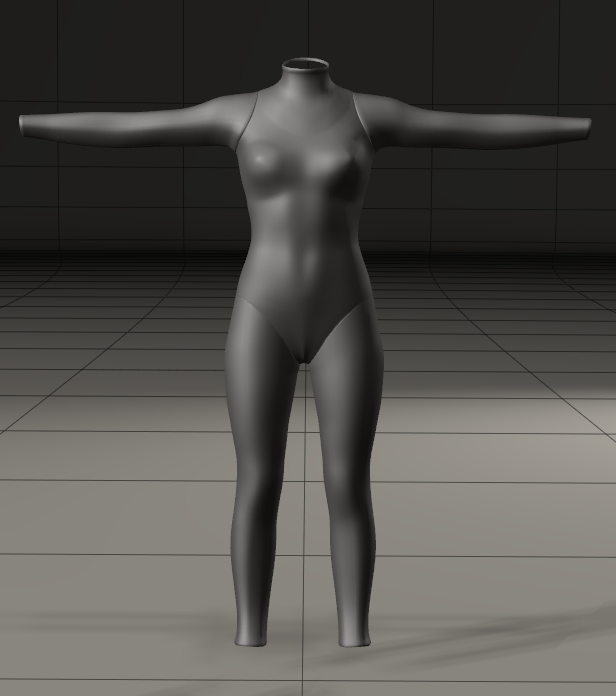
An imported clothing OBJ.
- With the object selected as the current item, click the Setup room tab to enter the Setup room.
- Open the Poser library, and click the Figures category. Locate the library folder that contains the original figure for which your clothing was designed. In the case of the example shown here, the Figures > Poser Content > People > Alyson folder is selected, since the suit is made for Alyson.
- Drag and drop the thumbnail for the original figure from the Library to the OBJ file in the Setup Room. A dialog asks you if you want to automatically group the setup geometry based on the groups of the new skeleton.
- Choose No if your clothing geometry has already been grouped.
- Choose Yes if your clothing geometry does not already have groups, or if you want to regroup the object. Poser will create the groups for you automatically.
- The skeleton is applied to the OBJ in the Setup room. You can then open the Group Editor to examine the groups in the OBJ and edit as necessary.
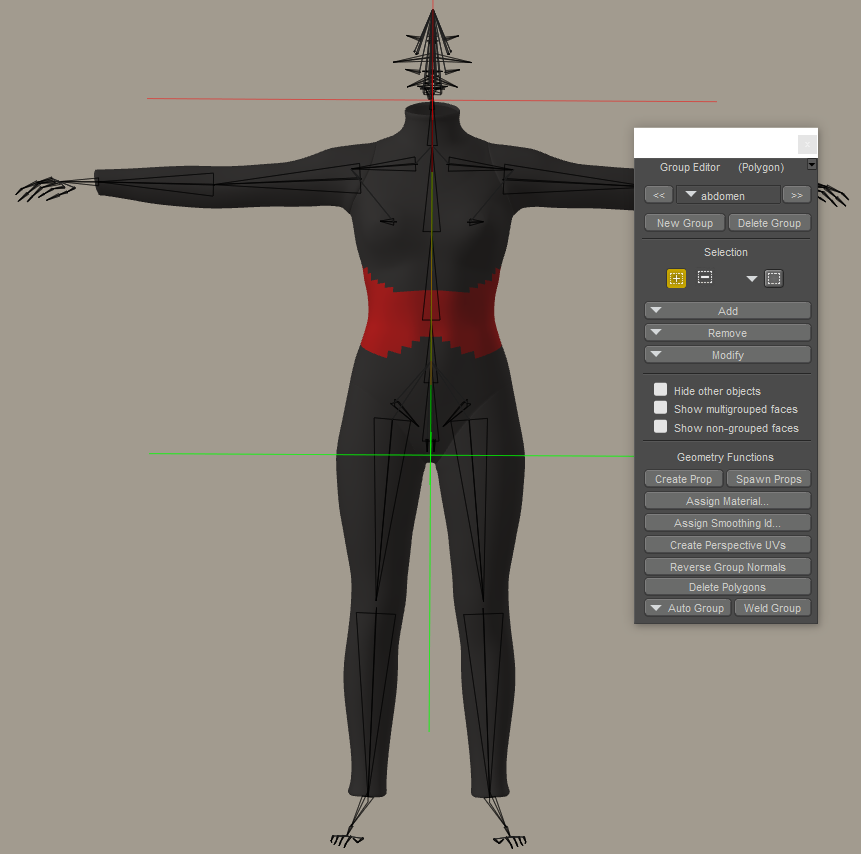
Examining groups with the Group Editor.
While examining the groups in the Setup Room, you may notice one or more groups that have all polygons assigned to them. For example, when you apply the Alyson skeleton to a clothing object, two groups (one named Figure, and the other named 1) have all polygons assigned to them. Select each of these groups in the Group Editor, and then click the Delete Group button to delete them.
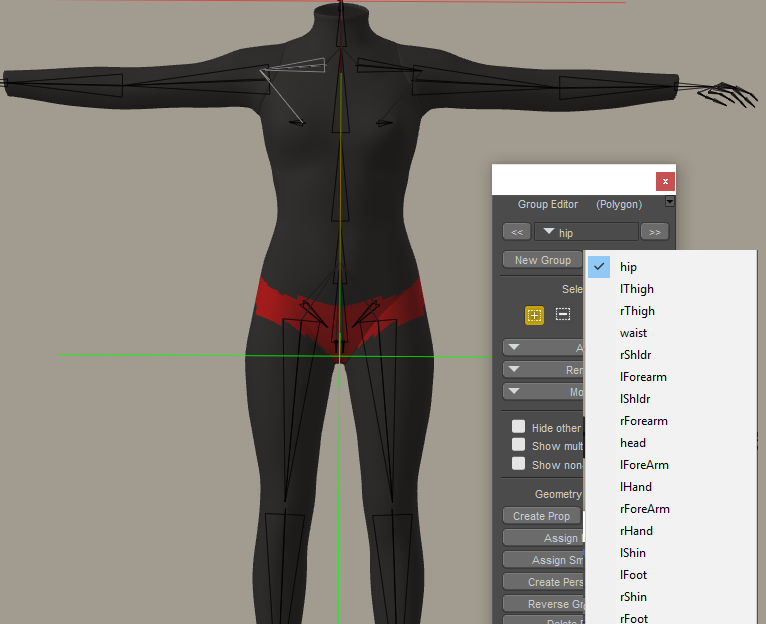
Review each group that has been created and edit polygons assigned to them if necessary.
- After you inspect all of the groups and have edited them to your satisfaction, you can return to the Pose Room. You should now have a poseable figure.
After applying the skeleton and joints to your figure, you should test the rotations of the joints in your clothing to make sure that falloff zones are adjusted for proper bending of the clothing. If you see polygons that do not bend properly, or which fly away from the figure when your character is posed, it is likely that you will need to adjust joint parameters such as falloff zones or inclusion/exclusion angles. The more the shape of the clothing deviates from the default body shape (for example, like puffy sleeves, or baggy/loose/flowing clothing), the more necessary it will be to adjust spherical or capsule falloff zones.
- Before conforming the clothing to your figure, or before saving the clothing to your library, choose Figure > Zero Figure to zero all joint rotations. Also use the Edit > Memorize > Figure command to memorize the conforming clothing. You may also want to assign a new name for the object in the Properties palette.
When Clothing Groups Change
If you change the grouping in your clothing OBJ after copying joint zones from the figure, you will notice that the clothing will spike or pose incorrectly when you pose the figure. The usual solution for this is to save the regrouped OBJ under a new name, create a new figure in the setup room, and then copy the weight maps from the old version of the clothing to the new version of the clothing.
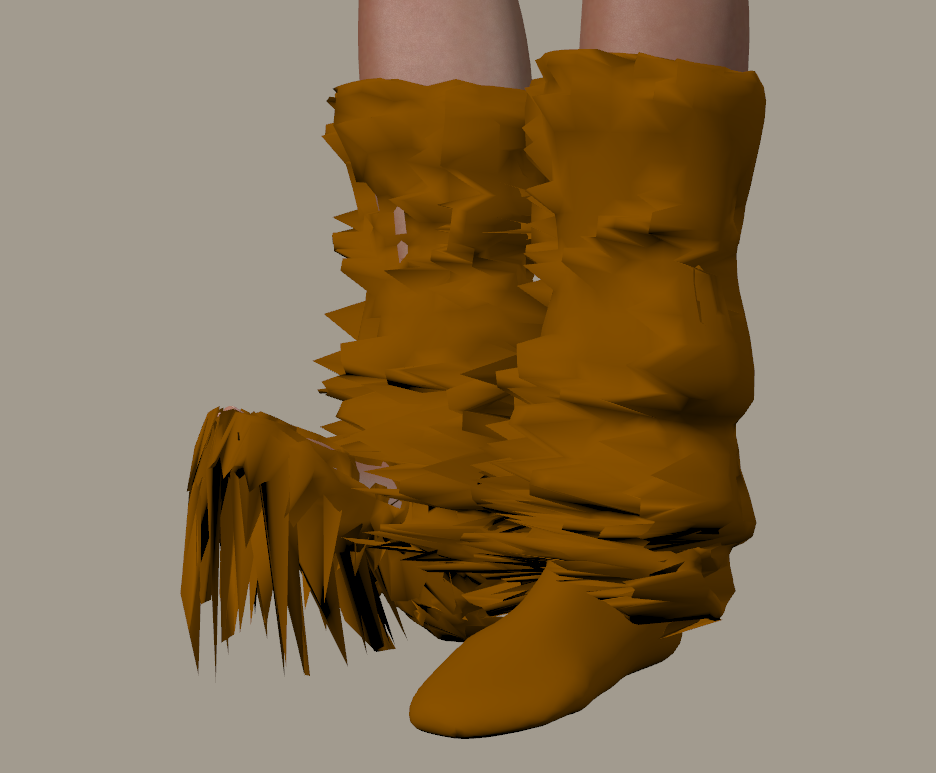
Unpredictable results happen if you change OBJ grouping after weight mapping.
The following workflow assumes the following:
- You have already created an OBJ named Boots1.
- You rigged Boots1 in the Setup room and transferred weight maps and joint zones from the figure using the Figure > Copy Joint Zones From command.
- A copy of Boots1.CR2 is saved in the Figures library.
Now you make changes to the Boots1 OBJ, and the grouping ends up changing. If you simply point the existing Boots1 CR2 to the new Boots2 OBJ, you will get spikes as shown above when the boots are posed.
To fix this, proceed as follows:
- Check that your new Boots2.OBJ file is welded and grouped properly. Save it to a subfolder in your Geometries runtime folder.
- Import Boots2.OBJ into Poser.
- Switch to the Setup Room. Use the original Boots1.CR2 as the donor rig for the new boots. Since the Boots2.OBJ is already grouped and welded, uncheck the option to perform autogrouping and also uncheck the option to transfer morphs.
- After returning to the Pose Room, save the new Boots2.CR2 to the library. Open the CR2 in a text or CR2 editor and change the OBJ path to point to the Boots 2 OBJ in your Geometries folder (the one that is welded and grouped).
- Delete the Boots2 obj/CR2 that is currently in your scene.
- Load both versions of the boots (Boots1.CR2 and Boots2.CR2) from the library into the scene.
- Select Boots2.CR2. Use the Figure > Copy Joint Zones From and the Figure > Copy Morphs From commands to copy weight maps and morphs from Boots1.CR2 to Boots2.CR2.
- Resave Boots2.CR2 to the library again. When you conform this new version to the figure, the weight maps and morphs should work correctly when the figure is posed.