Camera Views
Contents
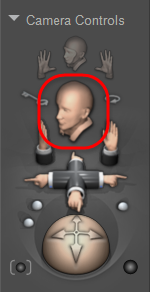
Select Camera Control
Clicking and dragging the cursor over the Select Camera control cycles through the available camera views and changes the Document or currently active view pane to the newly selected camera.
The Select Camera control.
Just above the main Select Camera control are three shortcut buttons for specific cameras. You can replace an existing camera shortcut with your currently selected camera by pressing [OPT]/[ALT] while clicking one of the Select Camera shortcut buttons. A shortcut for your currently selected camera will replace the previously existing camera shortcut.
The Main, Auxiliary, and Posing Cameras
The Main, Auxiliary, and Posing cameras are revolving cameras, which means they rotate about the center of the Poser workspace. By default, figures and props are placed at the center of the workspace. Moving figures/props does not alter these camera’s positions. The Auxiliary camera provides a secondary camera for your use, such as when you are deciding which shot to render and want to explore possibilities without affecting your previous camera positioning/animation work
The Posing camera is similar to the Main and Auxiliary Cameras except that it rotates about the currently selected figure, not the workspace. If you select another figure, the Posing camera moves to that figure/prop.
![]()
Main, Auxiliary, and Posing cameras as displayed in the Camera Controls.
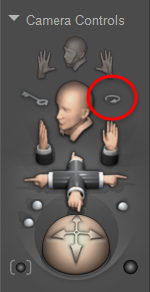
The Face Camera
The Face camera provides a close-up of the currently selected figure’s face, allowing you to precisely adjust facial expressions and see your results in detail. This camera rotates around the currently selected figure’s face and moves if you select another figure. This camera also works with animal figures. To switch to the Face camera, select your desired figure and click the Face Camera control.
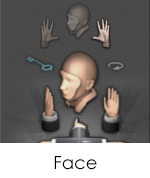
The Face camera displayed in the Camera Controls.
For the Face camera to work properly, be sure your figures’ heads have the internal name of "head" (with a small h) rather than Head (with a capital H).
Left and Right Hand Cameras
Like the Face camera, you can zoom in on the left or right hand of the currently selected figure to fine-tune gestures and other hand positions. Hand cameras also focus on the currently selected figure. If the figure is an animal, the Hand cameras will focus on the feet/paws/claws as appropriate. To switch to a hand camera, click the Left hand or Right Hand icon as appropriate.
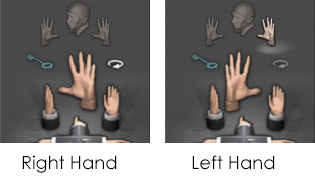
Left and Right Hand cameras as shown in the Camera Controls.
For the hand cameras to work properly, be sure your figures’ hands are all named with internal names of lHand and rHand, preceded with lower-case rather than upper-case letters.
The Dolly Camera
The Dolly camera rotates about its own center independently of scene contents, meaning it can move around and between elements in the scene. If you want to emulate a motion picture camera, the Dolly camera is your best choice.
Orthographic Cameras
The Left, Right, Top, Bottom, Front, and Back cameras are orthographic cameras, meaning that they product orthographic projections. Orthographic projections makes objects appear flat (2D), without the perspective of 3D views. Orthographic cameras cannot be rotated, since they are permanently aligned to the X, Y, and Z axes in the Poser workspace. Because of this, they make excellent references for viewing your scene.
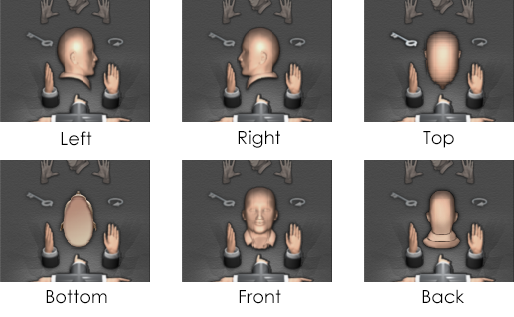
Orthographic cameras as shown in the Camera controls.
Shadow Light Cameras
Shadow light cameras are very useful for aiming lights and creating their shadows. Each light in your scene has one Shadow Light camera. Each shadow camera shares both XYZ location and aim direction with its assigned light. Poser uses these cameras to calculate shadows cast by the objects in each light’s path. Positioning these cameras and/or adjusting their parameters/properties can affect how shadows appear in your rendered scenes. You can select these cameras using the Select Actor pull-down menu. Shadow cameras have a reduced set of properties/parameters (see Camera Properties & Parameters for more information).
If you see poor depth map shadows in a portrait shot, or if you see warping or flickering shadows in animation, you can tweak the shadow cams to adjust the field of view to the parts of the scene that really matter.
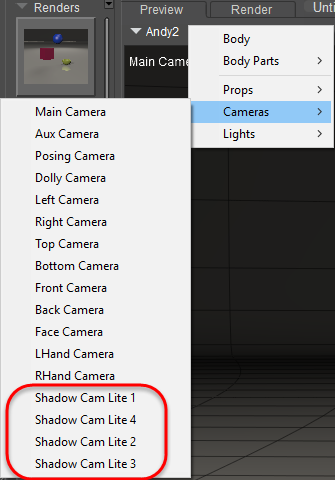
Shadow Light cameras displayed in the Select Actor drop down menu.
For more information about shadow light cameras, see .
Flyaround View
The Flyaround view places the currently selected camera on a virtual track above and away from the center of the Poser workspace and orbits around your scene, displaying all elements within view. This is an excellent way to quickly see how your scene looks in 3D space. Once activated, this view remains active until toggled off. To toggle Flyaround on and off, click the control or make the selection using the Cameras pull-down menu.
The Flyaround Camera control.