Aiming Lights
Spotlights, infinite lights and area lights are directional light sources, and therefore can be aimed with relation to your scene. You should finish posing your figures and positioning your props before aiming your lights. Doing this in reverse will cause your scene elements’ appearances to change as you move them. For example, rotating a figure 180 degrees causes illumination falling on its front to fall on its back. You may need to re-aim your lights to continue working. Some traditional artists place a bright light above and to the left of a figure. Using a strong single light source lets you see shading on distant and oblique surfaces, contributing to the scene’s depth and curvature. You may want to read books on lighting, including using lights in photographic studios, to give you ideas on using lights to enhance your Poser scenes.
If you import a background image or movie, you should set your lights to mimic the lighting in the background. For example, if your background image shows a strong light coming from the figure’s right, don’t light the figure from the left. This will help preserve consistency between your scene and the background and help integrate both elements together. Ideally, when working with backgrounds, you should have the background look like part of your scene. If your scene is a room using an image of a brightly lit background visible through the windows, you should have most of your lighting streaming in through the windows to blend the room and its contents with the outside world and lend realism to your scene.
You can aim lights using any of the following methods:
- Using the Light Position control (see below).
- Moving a light’s indicator in the Document (see below).
- Using the Editing tools (Rotate and Twist for infinite lights, and Rotate, Twist, Translate/Pull and Translate In/Out for spotlights and area lights. Please refer to The Editing Tools for information on using the Editing tools).
- Using the selected light’s parameter dials in the Parameters palette.
- Using the Object > Point At (Point At) or Object > Set Parent (Changing a Parent) menus.
- Using the desired light’s Shadow camera, described below.
As discussed above, infinite lights always shine into the scene. Aiming an infinite light sets the location from which the light shines (such as setting the sun’s position in the sky). When aiming spotlights, you’re setting both the angle at which the light shines and the light’s position in 3D space.
Using the Light Position Control
The globe in the center of the Light Position indicator represents your Poser scene in 3D space, and the light dots represent the positions of each of the lights within your scene. These dots can be moved in two ways with respect to the globe: Rotation and Revolution. Rotation keeps the light in the same physical position relative to the scene, but adjusts its direction around its own local axis. Revolution moves the light around the globe to a new position relative to the scene, while keeping the light pointed at its parent, as shown in the figures below. You can select which positioning method you wish to use by clicking either Rotate or Revolve in the Light Options pop-up menu. The check mark indicates which option is currently selected. Then click and drag your selected light dot(s) to change their position and/or direction. Revolving these dots to different positions around the globe adjusts the lighting angle, as shown below.
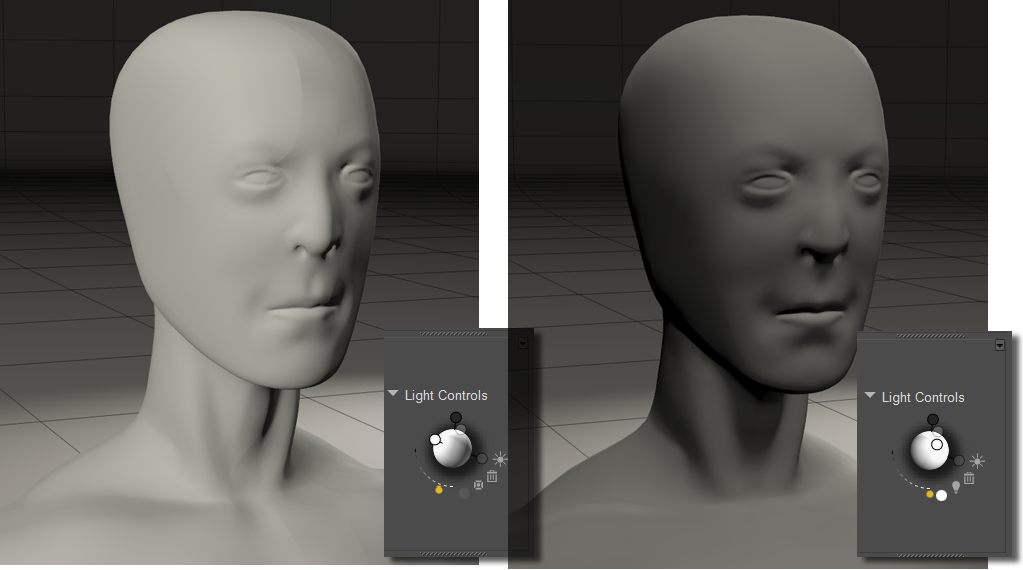
Adjusting light positions.
Clicking anywhere in the Light Position control selects the nearest light.
Viewing through Shadow Light Cams
You can use one of the Shadow Cam light cameras to view your scene through a specific light. Right-click on the camera name in the upper-left corner of the document window, and choose Camera View > Shadow Cam Lite X, where X is the number of the light that you want to view the scene through.
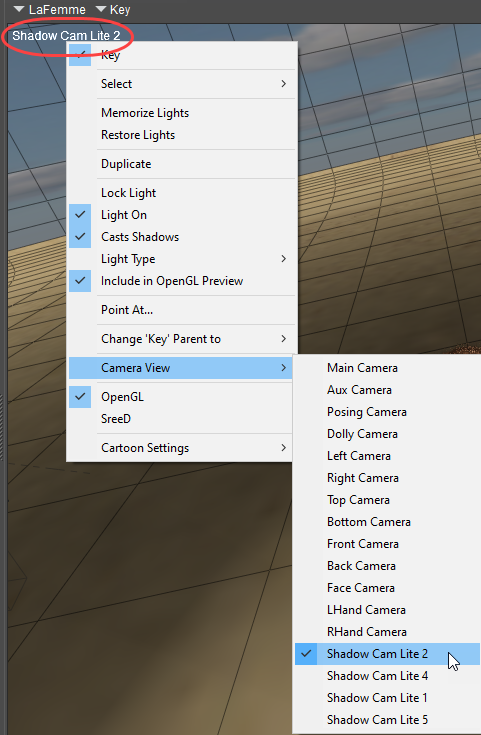
Choosing a Shadow Cam.
When viewing the scene through a shadow camera, its light indicator will always appear in the center of the light position control. Use gentle movements to reposition the light indicator, remembering that it always appears in the center as the view in the camera view changes. You can also use the parameter dials for the selected light to reposition the light as needed.
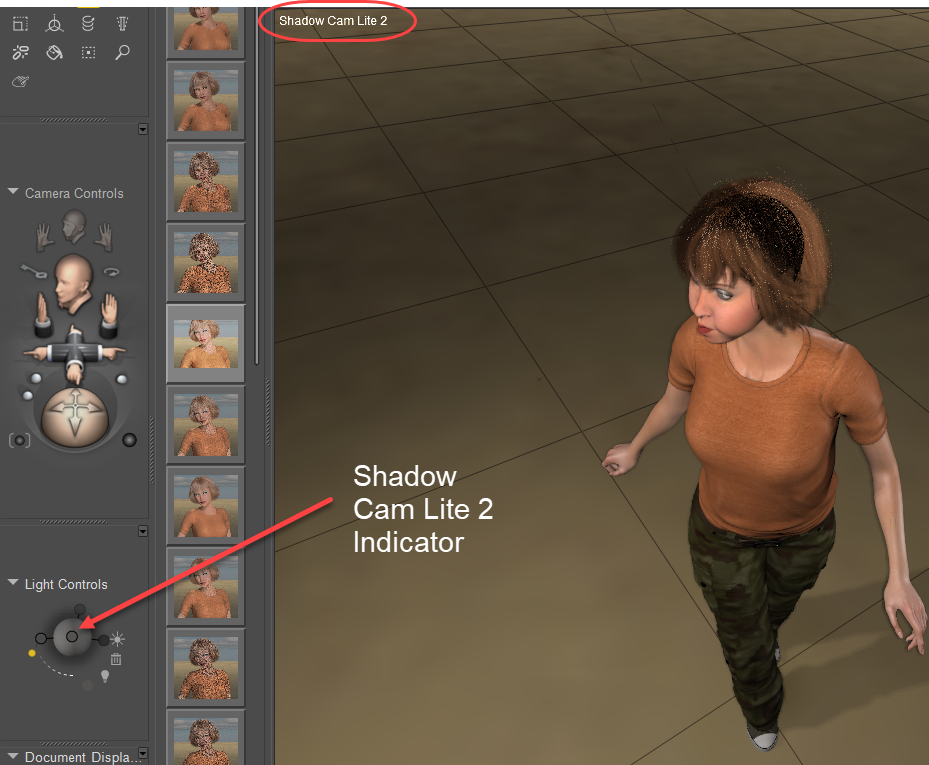
Viewing through a Shadow Cam.