Smoothing Scale Zones
Scale zones should be part of your character or conforming clothing development. The Scale Zones button, located in the lower portion of the Joint Editor Window, helps content creators improve the appearance of joint transitions when a body part is scaled along one or more axes. For proper operation when scaling weight mapped figures along a single axis, it is necessary to check the scale zones on each scaling axis (X, Y, and Z as they apply) for each adjacent body part.
For example, let’s say you have an adult male figure (here James, a G2 legacy figure, is being used as an example). You want to change him into a dwarf character. which means that you’ll want to substantially change the proportions of his thighs and shins.
Users of legacy figures know that body parts can only be scaled “so far” before they begin to crumble where they join adjacent body parts. For an example, compare this figure’s “normal” thigh (his left thigh) to the right thigh, which is scaled to 65%. You’ll notice that the thigh is bunching in the locations where it joins the hip and the shin.
The Scale Zones button in the joint editor allows you to set scaling zones that improves performance when characters and conforming clothing are scaled. You can then add weight maps to the blending areas to smooth the transitions when a body part is scaled.

Joint seams can bunch together when a body part is scaled along a single axis.
Using the same legacy figure as an example, the right thigh has been scaled along the Y axis. When you open the Joint Editor, you’ll see the normal center and rotation parameters (Twist, Side-Side, and Bend). But you’ll also notice scaling zones for the adjacent body parts ... one named rShin_ScaleY and another named hip_scaleY. The names of these scaling zones might vary from figure to figure, but they will always be preceded by the name an adjacent body part plus an underscore. These are the joint parameters that relate to the Scale Zones feature.
Paint the smooth scale zones to improve how parts scale together..
The Scale Zones button at the bottom of the joint editor allows you to add or remove scaling zones to the currently selected body part. At a minimum, adjacent body parts should be selected. But if it is possible that the scaling can “spill over” into other body parts, you can add them as scaling zones as well.
To assign the scaling zones, click the Edit Scale Zones button. The Select Objects dialog prompts you to choose body parts that will scale blend with the currently selected actor (the right thigh, in this case). Check any parts that you want to assign, making sure that the adjacent actors (the hip and shin) are included.

Click the Scale Zones button to select body parts to blend when the current part is scaled.
To smooth a scaling zone, scale the body part (the right thigh in this example) to the desired scale. Try to anticipate the maximum range that you would like the scaling to work. For example, it’s unlikely that you will want to scale a thigh to any less than 65% as shown in our example.
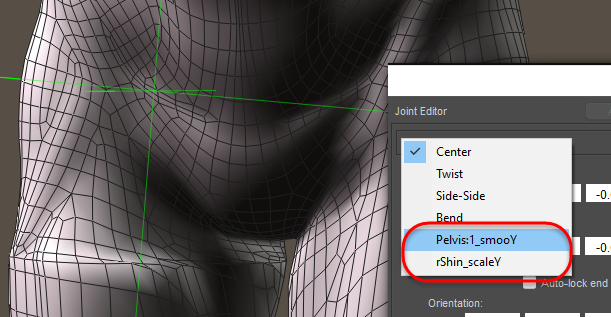
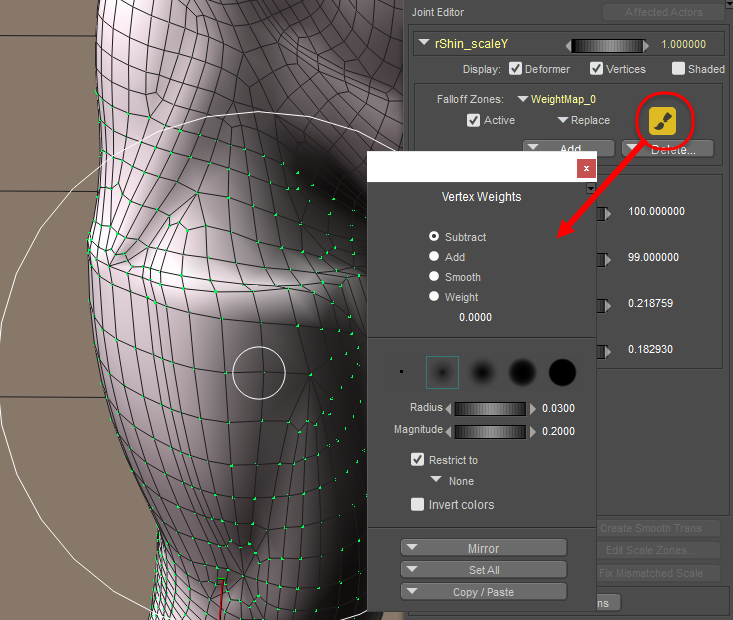
After you scale the part, open the menu in the Joint Editor to select the first scaling zone that you want to work on. In the following figure, the rShin_scaleY joint parameter is selected. This is the scaling zone, as it was named for that particular joint.
Painting scale zones.
When you select the scale zone, you may see No Zones in the Falloff Zones area (which will be the case when you are weight mapping a new or legacy figure that has not previously been weight mapped). If a weight map does not exist, you’ll need to create one for the scale zone. Simply use the menu in the Falloff Zones area of the Editor to choose Add Weight Map. Then make sure that the mode of the new weight map is set to Replace.
Scale zone maps have to be created for each body part that is connected to the currently selected actor. For example, if you have the right thigh of a figure selected, you’ll need to create scale zone maps for the hip and the shin. Of you have a chest selected, you’ll need to create scale zone maps for the right and left collar, and for waist or abdomen (depending on the group name that is adjacent to the chest).
When you copy weight maps from a character to conforming clothing, the scale zones should already be set up for you, but you will need to check the scale zones of each body part in the clothing to make sure they work as expected. Before you edit the scale zone weight maps on conforming clothing, select the BODY actor of the conforming clothing, and make sure that Include Scales when Conforming is checked in the Properties palette. Sometimes the easiest way to start a scale zone weight map is to collapse existing zones (spherical and capsule zones, if they exist) into a weight map and then start to smooth them with the weight painting tools.
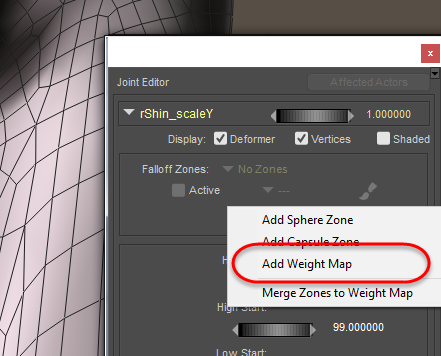
Add a weight map to the scale zone if needed.
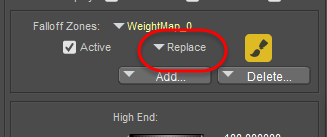
Make sure the weight map is set to Replace.
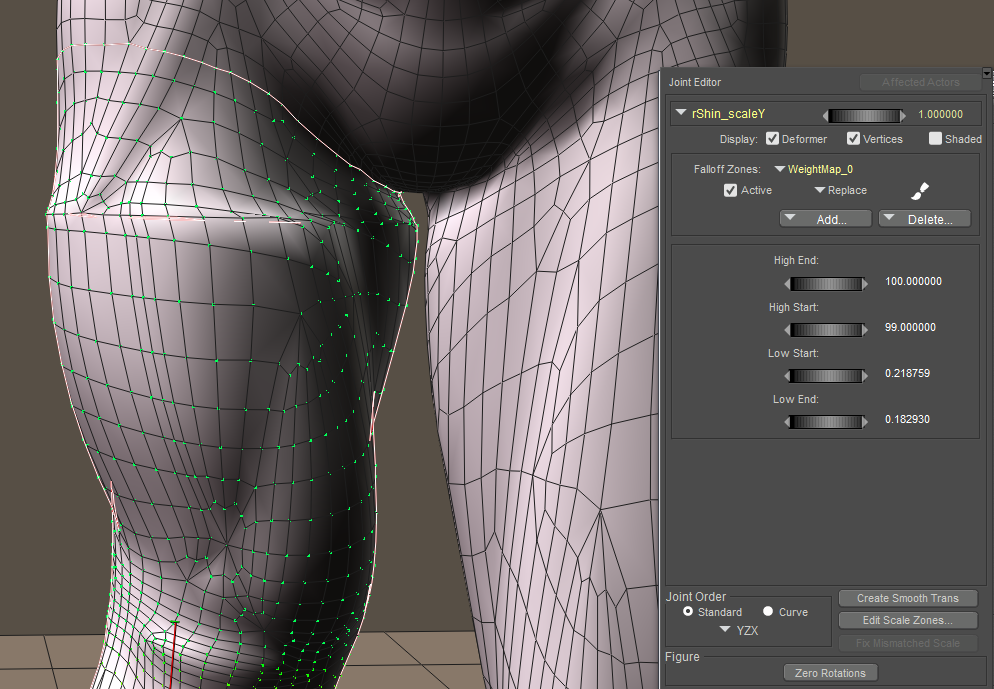
With the appropriate scale zone weight map selected, you can begin to use the Weight Painting tools to smooth out the scale zone. The process is similar to that mentioned in Painting Weights.
Use the weight painting tools to improve the appearance of the smooth zone (here, in progress)
As you smooth out the current body part, you might notice that there are areas near the adjacent body part that you can’t get as smooth as you like. This is probably because it falls in an area that is affected by both body parts. For example, as you work toward the top of the thigh, you might see that you can’t smooth it out all the way. In that case, you’ll want to check the smoothing zones in the hip, and make sure that you have the correct smoothing zone selected (rThigh_ScaleY). Add a Replace weight map to it if necessary, and then use the weight painting tools to smooth out that area.
You will need to cross over to the adjacent body part and work on its corresponding scale zone. Select that part and verify that it has a corresponding weight map before you paint it. When you paint close to the seam lines, be careful not to overblend because it might create a ridge at the seam. Go back and forth between the two areas until you get an acceptable blend.
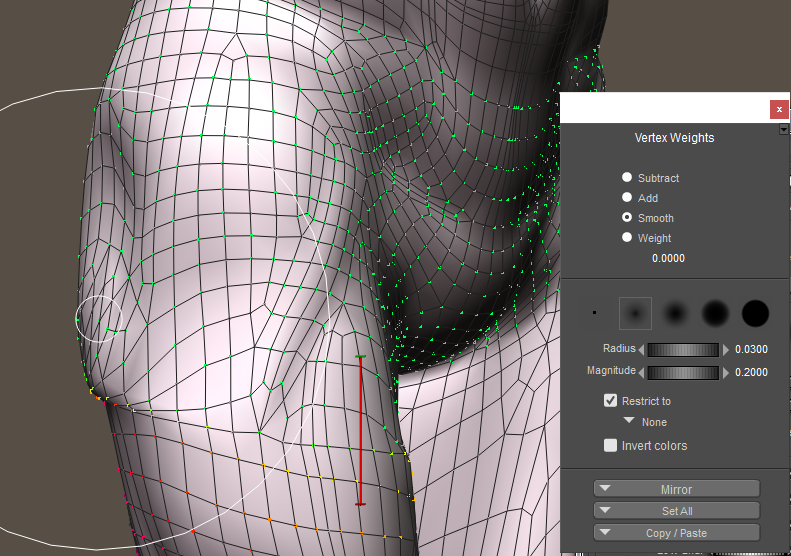
Adjacent body parts may also affect a scale zone. Here, the scale zone for the hip also affects the right thigh and should be smoothed.
To summarize:
- Scale zones should be checked for each body part in the figure that you are rigging.
- To determine the scale zones that you need to adjust, click to select a body part, and then look for joints that begin with the name of the currently selected body part, followed by an underscore and a scale zone name (example: rThigh_ScaleY, or rThigh_smooY)
- If there are existing sphere or capsule zones associated with the scale zone, collapse them into a weight map set to Replace. If no zone exists, create a new weight map set to Replace.
- Go back and forth between the currently selected body parts and the adjacent body parts when you smooth out the scale zone weight maps. Take care not to oversmooth, as it can create a crease at the joint.