Working with Falloff Zones
The sections that follow describe other ways that you can work with falloff zones.
You learned how to create a weight map in Poser in the section Weight Maps. If you want to create a spherical or capsule falloff zone, the steps are similar. Follow these steps:
- Select the joint that you want to work on.
- Open the Joint Editor, and select the appropriate rotation (Side-Side, Front-Back, Up-Down, or other).
- In the Falloff Zones section, click the + (plus) sign to create a new falloff zone. Choose one of the following options:
- Add Sphere Zone: Choose this option to create a spherical falloff zone.
- Add Capsule Zone: Choose this option to create a capsule-shaped falloff zone.

Adding a Falloff zone.
- Use the Editing Tools or the parameter dials to adjust the scale, rotation, and translation of the inner and outer MatSpheres (see Spherical Falloff Zones ) or MatCapsules (see Capsule Falloff Zones).
- Repeat steps 1-4 to add additional falloff zones if desired.
Blending Multiple Falloff Zones
In addition to offering three types of falloff zones, you can also use more than one falloff zone for a joint. The Joint Editor provides a drop-down menu that lists the falloff zones that have been created for each joint. You can add one or more spherical, capsule, or weight map falloff zones to any joint.
For an example of using multiple falloff zones, open the Library and select the Figure category. From the People folder, add Alyson or Ryan (version 1) into your scene. In the Joint Editor, select the Side-Side property of the right or left Buttock. Click the Down arrow to display the list of zones for the currently selected joint. When you expand the list of falloff zones, you’ll see several as shown below.
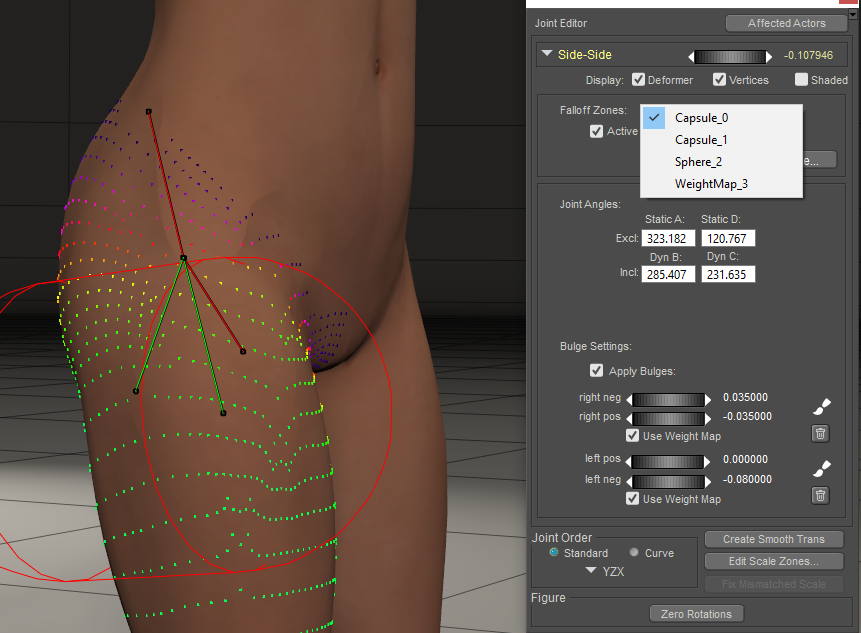
Blending falloff zones.
The CR2 will display a list of zones that affect each joint. Figures that use multiple falloff zones or capsule zones will not be compatible with older versions of Poser. To create a figure that is backwards compatible with earlier versions of Poser, use only a single Spherical Zone on the joints that use falloff zones.
To change the blending method for a falloff zone, follow these steps:
- Select the joint that you want to modify.
- Expand the Falloff Zones selection menu, and select the sphere or capsule falloff zone that you want to change.
- Select Multiply, Add, or Replace from the blend mode selection menu.
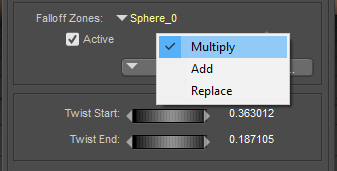
Choosing a blending type.
Deleting a Falloff Zone
To delete a falloff zone, follow these steps:
- Select the joint that you want to modify.
- Expand the Falloff Zones selection menu, and select the falloff zone that you want to delete.
- Click the Delete button in the Falloff Zones area of the Joint Editor and choose Delete Current Zone from the menu that appears.
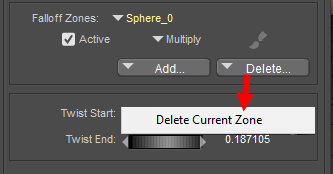
Deleting a falloff zone.
Enabling or Disabling a Falloff Zone
When a joint rotation uses multiple falloff zones, you can enable or disable the influence of a specific falloff zone to determine how that particular falloff zone affects the joint rotation. This can help you make adjustments to the areas that are affected by the selected falloff zone.
To enable or disable a falloff zone:
- Select the joint that you want to examine, and rotate the joint as necessary to determine the effects of the falloff zones.
- Expand the Falloff Zones selection menu, and select the desired falloff zone.
- Check the Active checkbox to enable the falloff zone, or uncheck to disable it.
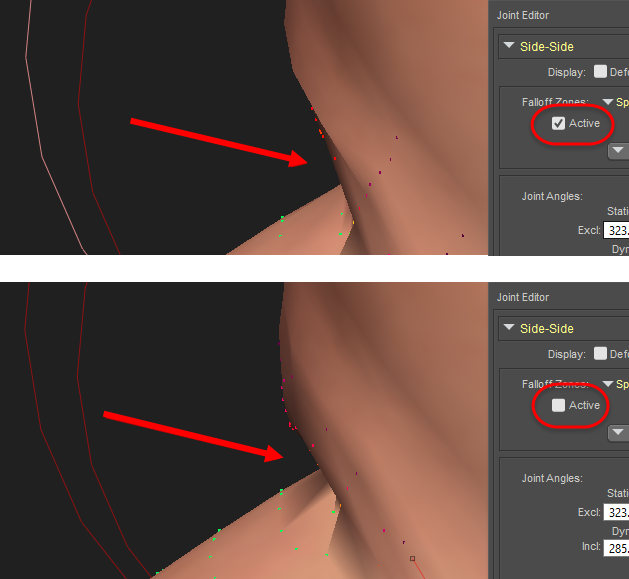
Falloff zone enabled (top) and disabled (bottom).
Changing Falloff Zone Display Mode
The default display mode for spherical and capsule falloff zones is Outline mode. However, you can display falloff zones in any available mode. To change how a falloff zone is displayed:
- Select the falloff zone that you want to change.
- Select Display > Object Style.
- Select your desired display mode. For example, Wireframe mode allows you to see the spheres’ areas of effect while still being able to see the underlying bones/geometry. Wireframe modes are recommended, as solid shaded modes will make it difficult to pick underlying Fall Zone geometries.
The following figure shows a capsule zone displayed in its default display mode (top), and with the innerMat capsule changed to Wireframe display style (bottom).

An innerMat Capsule shown in default (top) and Wireframe display style (bottom).