.png)

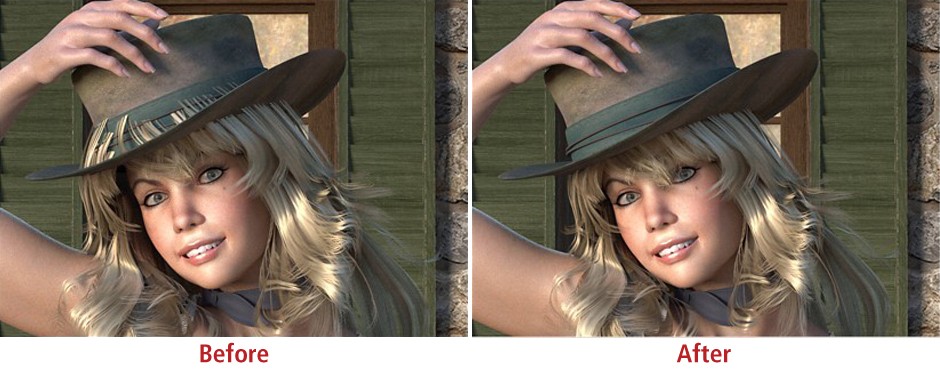
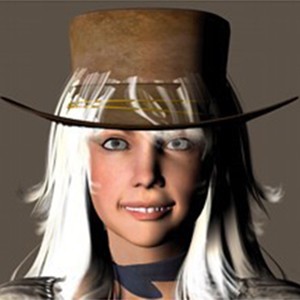
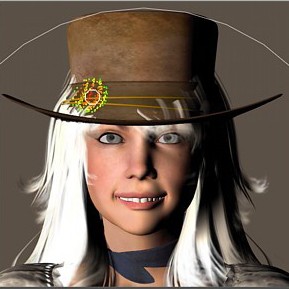
Have you ever wanted to use a particular head covering in Poser but found the included morphs limiting? Was your choice of hair determined by that? The Morphing Tool in Poser allows you to use any hair you like - no matter how big - with the headwear of your choice.
The results will amaze you, but the best part is that any changes you make can also be saved as Morph Targets for future use.
How to use Poser's Morphing Tool
In this tutorial, Kalypso uses Rhi's Hatz by RPublishing and La Femme Pro.

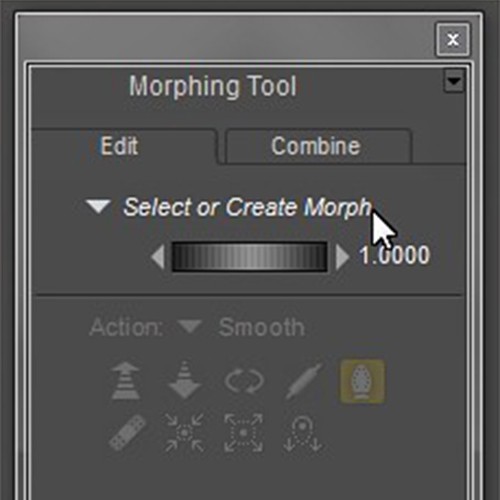
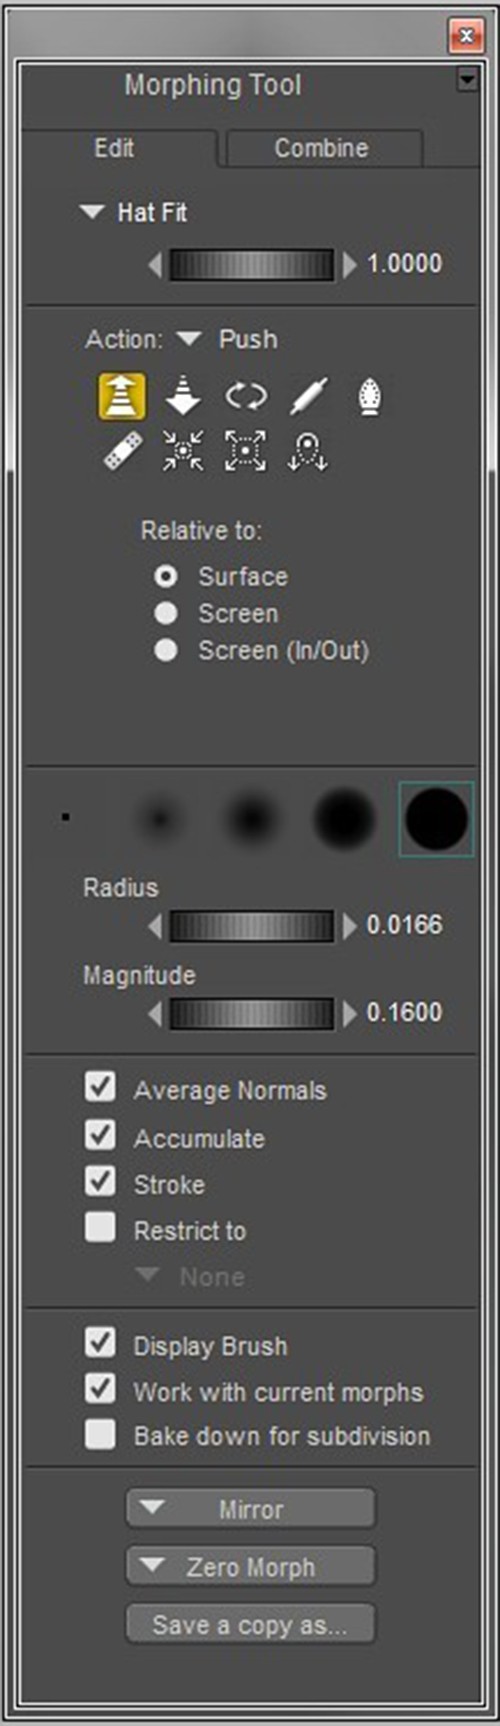
5. When the Morphing Tool palette appears, you have a choice of two tabs (Edit or Combine). The Edit Tab is used to create a New Morph.
The next step is to Select or Create Morph and when that is clicked you are presented with this choice.
When you click on "New," you will be prompted to name the morph or just keep the default name.
6. After creating and naming the new morph, the tools will be enabled, and the palette will look like this.
For something as simple as fitting hair under a hat, most settings can be left on default.
The Poser Manual includes a detailed description of each Action available, along with images to show the effects they have. In this specific example, the Push Action will mainly be used to actually push the vertices of the hair in so that they don't poke out of the hat. Other useful actions for more detailed work are the Tighten Fit and Smooth.
You will also have a choice of five round brushes that will determine how precise the action will be.
The first brush on the left is going to affect only one vertex that is nearest to your mouse pointer. The rest of the brushes have different degrees of falloff so that certain areas within the brush are affected more than others. This can be seen in the colors as the red affects the area the most while the green the least.
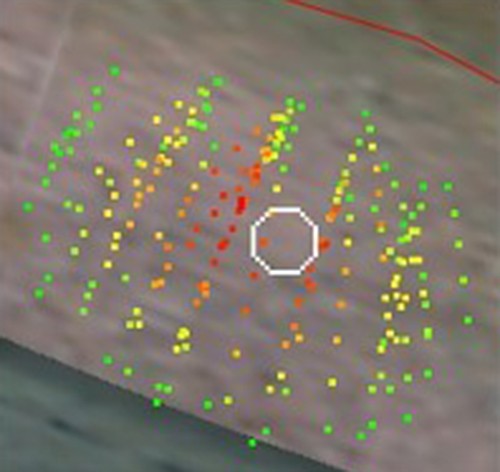
You can start going over the parts poking through with the brush of your choice and adjusting the Radius and Magnitude as needed. Naturally a smaller radius and lower magnitude are suited to more precision morphing while dealing with larger areas is easier as you increase these.
Once you're finished and have posed your character, you may want to go back and make some minor adjustments. It will be easier to create another New morph for further adjustments. The hair can now be saved back to your library for future use. It is recommended not to overwrite the original, but save a new copy instead.
The Poser 12 Reference Manual is a great place to start learning how to use all the features Poser has to offer. The Morphing Tool's Edit Tab is explained in detail and will help you in achieving desires results in your morphs.


