The Poser Library
Poser’s hierarchical Library palette provides access to all of the content that ships with Poser such as figures, props, lights, cameras, etc. It has three tabs: the Library tab that provides access to the Poser content categories, the Search tab which allows you to search your content folders for specific files, and the Favorites tab where you can gain easy access to your frequently used or favorite content items. The Library tab contains ten categories, discussed below. Each category is further divided into subcategories. You can create and remove categories and subcategories, and can add and remove content, including your existing content libraries, to/from the Library palette. See Maintaining Your Library Palette for information on maintaining your Library palette.
The Library palette consists of four tabs.
- The Library tab contain Poser’s Library content categories. The Categories icons allow you to access and search through all of the content available to your installation of Poser, including content included with Poser and any additional content you may have obtained. The Library tab contains categories (Figures, Props, etc.) and subcategories (Animals, New Figures, etc.) for organizing your Poser content: You can also organize your favorite content in the Favorites tab for even quicker access. Use the Library tab to add or remove elements from your Poser scenes. The vast collection of content included with Poser allows you start building scenes right away. The Library makes it easy to add existing and new content collections so that you can find and add any items to your scene. Please refer to The Poser Library for more information about the Library palette and to Changing the Library Appearance for information on how to show and hide the various elements in the Library tab.
- The Search tab allows you to perform keyword searches through one or all of your runtimes. Use the Search tab to perform keyword searches on one or all of your Runtime libraries. This powerful new feature makes it easier to find the content you want to use, even in large content collections. You’ll find more information in Searching the Library.
Poser ships with a wide array of content that you can use to create thousands of unique still and animated scenes. You can also use the search feature in the Library to locate and obtain even more free and for-sale content from leading 3D marketplaces! Please refer to Searching the Library for more information.
- The Favorites tab on the Library palette provides quick access to your favorite Poser content. For more information about adding favorites, see Favorites Tab
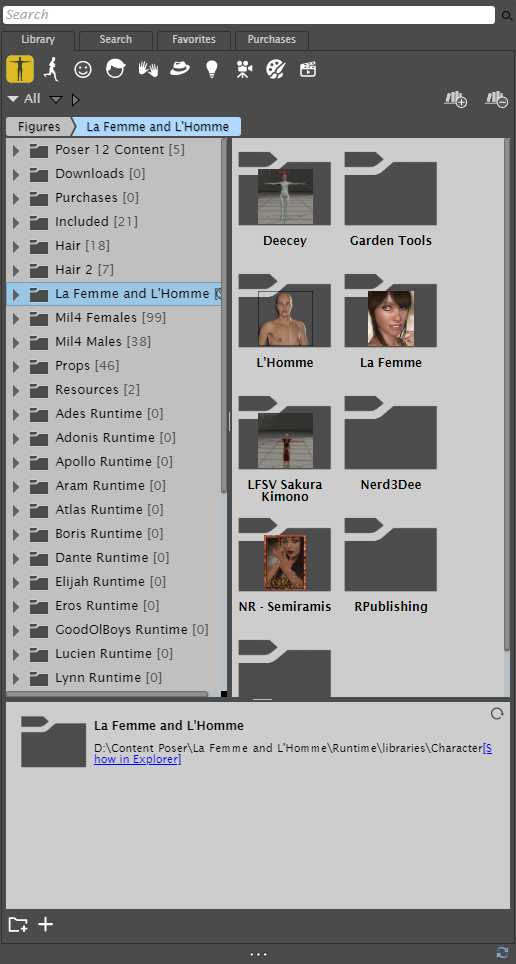
Library tab.
- The Purchases tab allows you to install included content and items that appear in your purchased items list in your Renderosity account.
The following figure shows the various controls and options that are contained in the Library palette. You can navigate through the Library list as follows:
- Use the Up and Down arrow keys to move higher or lower in your content tree.
- Use the Right and Left arrow keys to open and close folders.
- Click or select an item in the list to expand the display and view a larger preview of the content item.
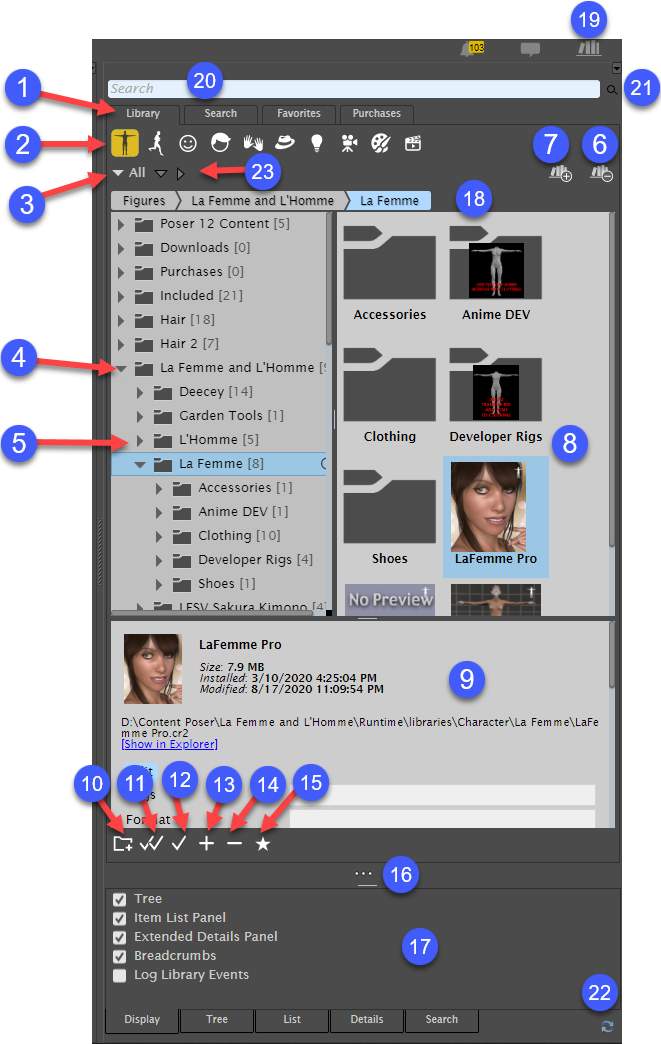
The Library Window.
- Library Tabs: Allows you to switch between three views in the Library palette: Library, Search, Favorites, and Purchases.
- Category Icons: Allows you to select one of the ten library categories. From left to right, they are Figures, Poses, Faces, Hair, Hands, Props, Lights, Cameras, Materials and Scenes.
- Library Selection: Click the Show Library selector to display all runtime folders, or to display the contents of a single selected runtime folder in the library contents window.
- Expanded folder: Click the down arrow to collapse the contents of the folder. The number that appears in brackets at the beginning of the folder name designates the number of items that are contained within that folder.
- Collapsed folder: Click the right arrow to expand the contents of the folder. The number that appears in brackets at the beginning of the folder name designates the number of items that are contained within that folder.
- Remove Library: A Remove Library (-) icon appears to the right of the Add Library icon when you use the Show Library menu to select a Library that you added yourself through the Add Library command. See Removing Libraries for details.
- Add Library: Click the Add Library (+) icon to open the Browse for Folder dialog, which allows you to select additional Library folders that you have stored on your computer.
Content that is created for Poser is typically arranged in a folder named Runtime, with subfolders beneath that for geometry, textures, and library items. For more information about creating, installing and accessing additional library folders, see Accessing Different Content Libraries
- Item List Panel: The currently selected item is highlighted in blue and displays controls to add the selected item to the scene or to display item information. If the Item List Panel is not displayed, the currently selected item displays as a larger icon in the Tree view.
- Extended Details Panel: Displays a thumbnail, filename, file size, installation date, and other details about the item that is selected in the library. This information appears in the XML file that is saved in the same folder as the library content. An Extended Details editor also allows you to add or edit the metadata associated with the selected content item.
- Add a Folder (+}: Appears when a folder is selected. Click this button to create a new folder or subfolder beneath the currently selected library folder.
- Double Check mark: Click the double-check mark icon to add the currently selected item to your scene. The double check mark does not appear for every Library category and the purpose varies depending on the selected category. See Loading and Managing Items using the Library Icons.
- Single check mark: Click the single check mark icon to replace the item that is currently selected in your scene with the item that is highlighted in the library. Functions of the single check mark button vary, depending on the Library category that is currently selected. See Loading and Managing Items using the Library Icons.
- Save to Library (+): Appears when a folder is selected. Click this button to add the item that is currently selected in your scene into the library.
- Delete from Library (-): Click this button to delete the library content item that is currently selected. Note that this button completely removes the library item from the Library, not from your scene.
- Add to Favorites: Adds the item that is currently highlighted in the library to the library’s Favorites tab.
- Display Options Widget: Click the Display Options widget to expand or collapse the display options in the bottom of the Library palette.
- Display Options: Use the Display, Tree, List, and General display options to configure how content is displayed in the Library palette.
- Breadcrumb Trail: Displays the library path to the currently selected folder or item. Use the Up arrow at the left of the breadcrumb trail to navigate up to the previous folder level.
- Library Display Widget: Click this widget to show and hide the library window.
- Library Menu: Click the Docking Control icon (the small arrow) in the upper-right corner to select commands that dock, undock, close, or enable/disable dragging. Refer to Enabling or Disabling Docking for further information.
- Search: Enter text to search for and then click the Search button located at the right of the search field.
- Library Refresh Button: Click this button to refresh all of the content in the Library after you install new or updated content.
- Expand All and Collapse All buttons: After choosing a library from the Library Selection list (see #3), click Expand All to display all items in the currently selected runtime. Click Collapse All to collapse all items in the currently selected runtime.