Combining Morphs in Poser
Contents
Poser provides a number of different ways that you can combine body morphs to create unique characters. For example, you can use the Object > Spawn Morph Target command to create a parameter dial for body parts and props that have been modified with deformers. The Figure > Create Full Body Morph command allows you to create a single master dial in the Body to drive morphs in several different body parts. Additionally, you can use Dependent Parameters to create master parameter dials that, in turn, create more realistic interactions between body parts and rotations.
Spawning Morph Targets on Figures
The Figure > Spawn Full Body Morph command creates like-named morph targets on Poser Unimesh figures for all body parts, and then creates a matching master parameter. You can use this command to capture deformations that are created through simulations such as soft body dynamics or the Cloth Room.
The general steps are as follows:
- Load in a Poser Unimesh figure, or use the Figure > Skinning Method > Poser Unimesh command to convert a traditional Poser figure to Unimesh.
- Create a simulation (for example, soft body dynamics or cloth simulation).
- Select the figure and choose Figure > Spawn Full Body Morph.
You can export this character from Poser to FBX format and use the morph as a blend shape in the Unity Inspector.
Spawning Morph Targets per Object
In addition to the Edit tab on the Morph Editor palette, you can also create morph targets in Poser directly from the Properties palette. Selecting Object > Spawn Morph Target creates a morph target from deformed objects (body parts, props) in your scene. You will be asked to name your new morph target, and a dial with your specified name will appear in the object’s Parameters palette.
Shape an element using any combination of deformers you like to get the results you want. Shaping multiple elements on a body part includes all changes in the shape in the morph target.
- Select the body part/prop’s properties in the Properties palette, then select Spawn Morph Target. A dialog appears asking you to name your new target.
- Enter your desired name and click OK. A parameter dial appears in the Parameters palette with the name of your new morph target. At this point, you can delete all deformers used to create the morph.
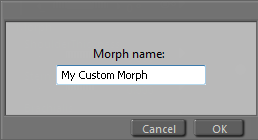
Assigning a name to a custom morph.
Numbers greater than 0 apply the morph to the selected element(s), and vice versa. A value of 1 means the morph target is fully applied, a value of -1 means the morph is completely inverted, and numbers greater than +/-1 create exaggerated effects. Using the Bulging Bicep example, a value of 1 applies the bulge fully, a value of -1 applies a full concavity (the reverse of the original morph), and so on.
Creating Full-Body Morphs
You can save multiple body parts and then save the entire pose as a full-figure morph target, also known as a Full-Body Morph (FBM). The new morph target encompasses all of the parameters for that pose, meaning that everything morphs at the same time.
Only morph channels combine into a full-body morph. Deformers are not automatically turned into morph targets for full-figure morphs, nor are scales, rotations, and translations.
When you create a full body morph, the master parameter dial in the BODY will be set to a value of 1, and the dependent parameter dials in each individual body actor will be set to 0, which is more in line with how full body morphs are typically set up manually.
To create a full-body morph target:
- Create morph targets for as many body parts as you wish. Refer to this section for assistance if needed.
- Morph each body part using the new Parameter as discussed in Parameters Palette. Set them to the values you want to appear in the full-body morph. For example, setting the Bulging Bicep value to 0.5 means that the full body morph, when set to 1, will morph that part of the figure as if you had applied the original morph with a value of 0.5.
- Select the entire figure, then select Figure > Create Full Body Morph. Enter a name for your new morph in the Set Name dialog that appears.
When you select the figure’s body again, a parameter dial with your new morph target will appear. This morph functions just like any other morph: Numbers greater than 0 apply the morph to the selected element(s), and vice versa. A value of 1 means the morph target is fully applied, a value of -1 means the morph is completely inverted, and numbers grater than +/-1 create exaggerated effects. Using the Bulging Bicep example, a value of 1 applies the bulge fully, a value of -1 applies a full concavity (the reverse of the original morph), and so forth.