.png)
OpenGL Cartoon Rendering in Poser: The Easiest Way to Get a Comic‑Ready Look
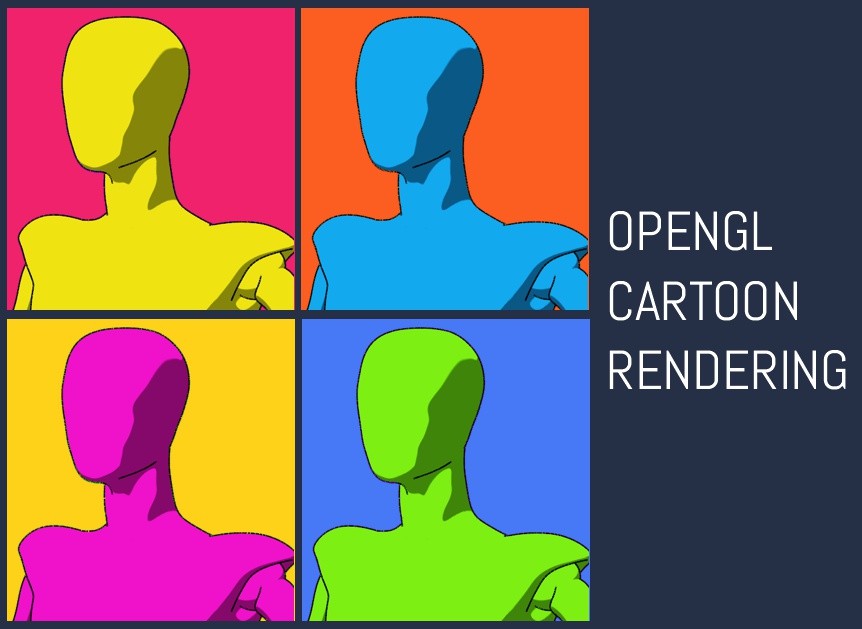
If you’ve ever wished your 3D scenes could instantly take on the charm of a hand‑drawn comic or the bold simplicity of a graphic novel, Poser’s OpenGL Cartoon Render mode is your new best friend. It’s fast, it’s intuitive, and it gives you a clean, stylized look without wrestling with complicated shader networks or post‑processing tricks.
In other words: Poser makes cartoon rendering a one‑click experience.
Let’s walk through how it works — and why it’s such a game‑changer for storytellers, illustrators, and comic creators.
Step 1: Switch to Cartoon Mode
Poser keeps things beautifully simple. To activate the cartoon look, just choose:
Document Display Style → Cartoon
or
Document Display Style → Cartoon with Line
That’s it. No setup, no node wrangling, no shader gymnastics.
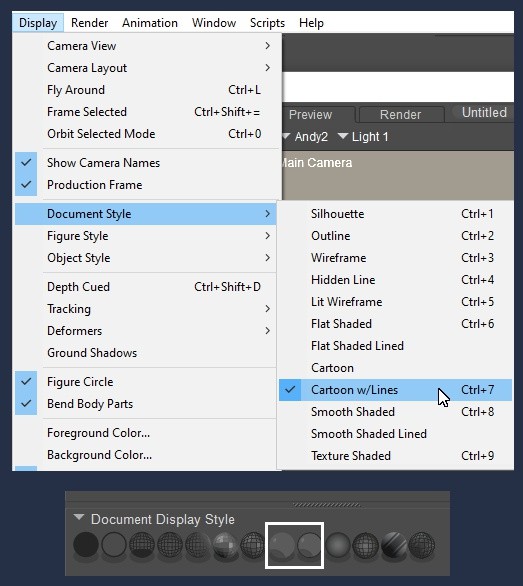
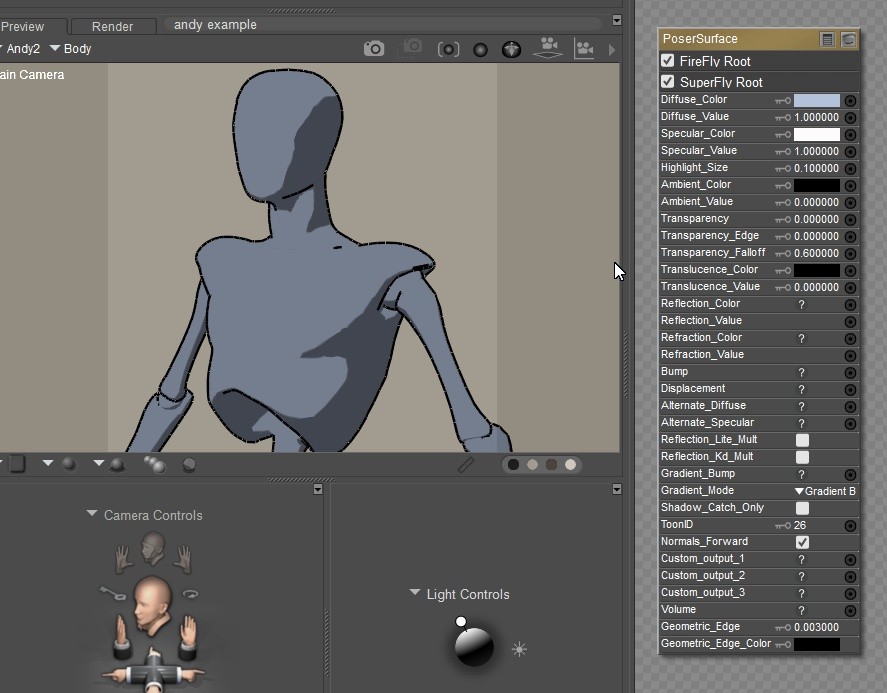
Behind the scenes, Poser uses the Diffuse Color from your materials — driven by the Poser Root node — to generate the stylized look. It’s that straightforward.
Step 2: Explore the Cartoon Settings
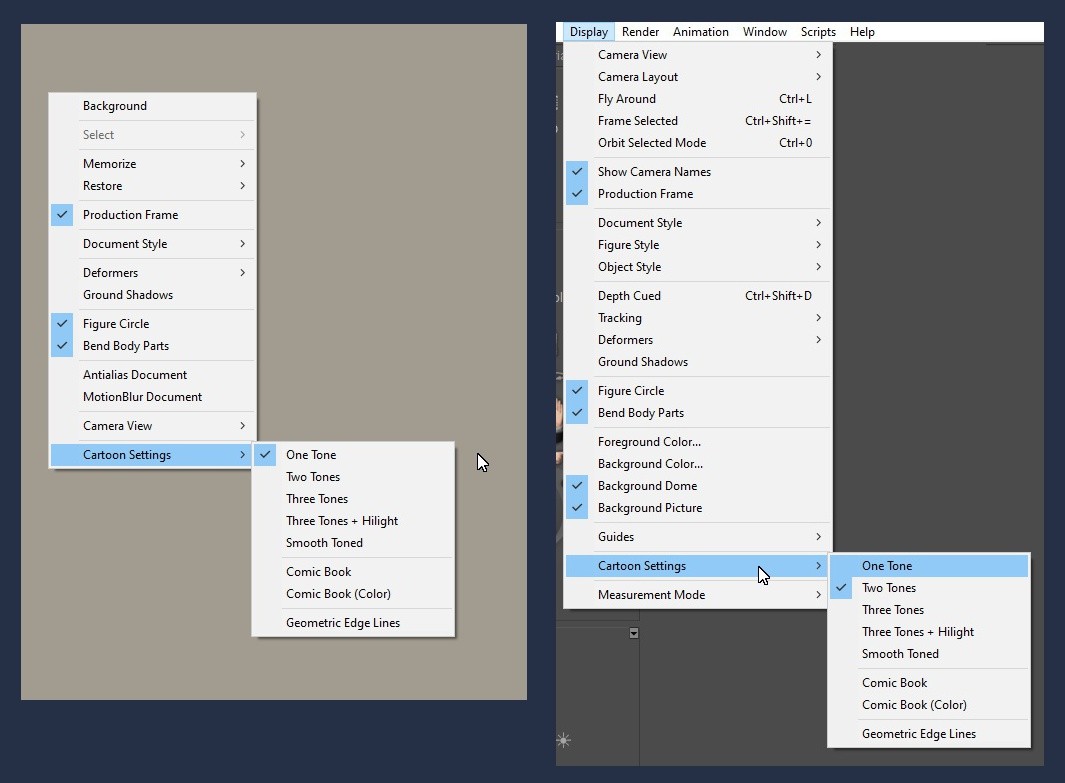
Right‑click anywhere in the Preview window or go to:
Display → Cartoon Settings
You’ll see three categories:
Shading Styles
Comic Book Settings
Geometric Edge Lines
For this guide, we’ll focus on Shading Styles, which control how your tones appear.
These options only show up when your Document, Figure, or Element Style is set to Cartoon or Cartoon w/ Line — so make sure you’re in the right mode.
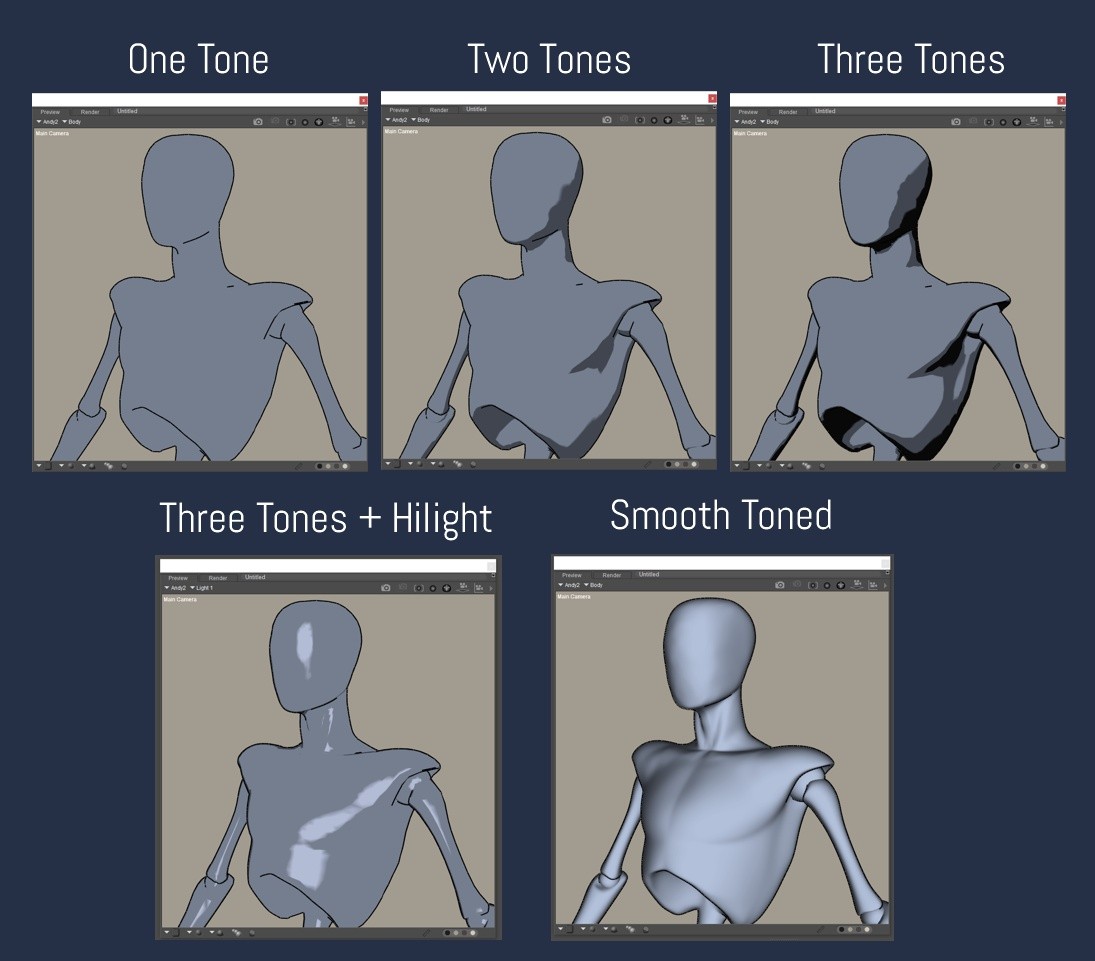
Shading Styles Explained
Poser gives you several tone‑based styles, each offering a different flavor of comic aesthetics:
One Tone, Two Tones, Three Tones
These create a flat, posterized look with 1–3 grayscale values.
Perfect for bold, graphic‑novel silhouettes or retro comic vibes.
Three Tones Plus Highlight
Adds a bright highlight area on top of the three-tone shading.
Great for shiny surfaces, dramatic lighting, or stylized realism.
Smooth Toned
A softer, blended look without hard boundaries.
Ideal for creators who want a hybrid between toon and traditional shading.
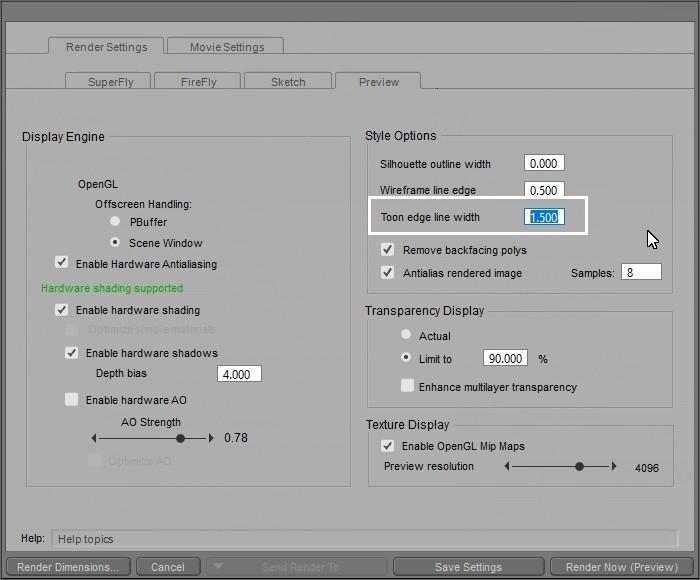
Step 3: Adjust Your Line Width
If you’re using Cartoon with Line, you can control the thickness of your outlines:
Render Settings → Preview Tab → Toon Line Width
A thicker line gives you a bold comic-book feel.
A thinner line leans toward animation or manga styles.
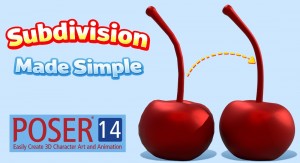
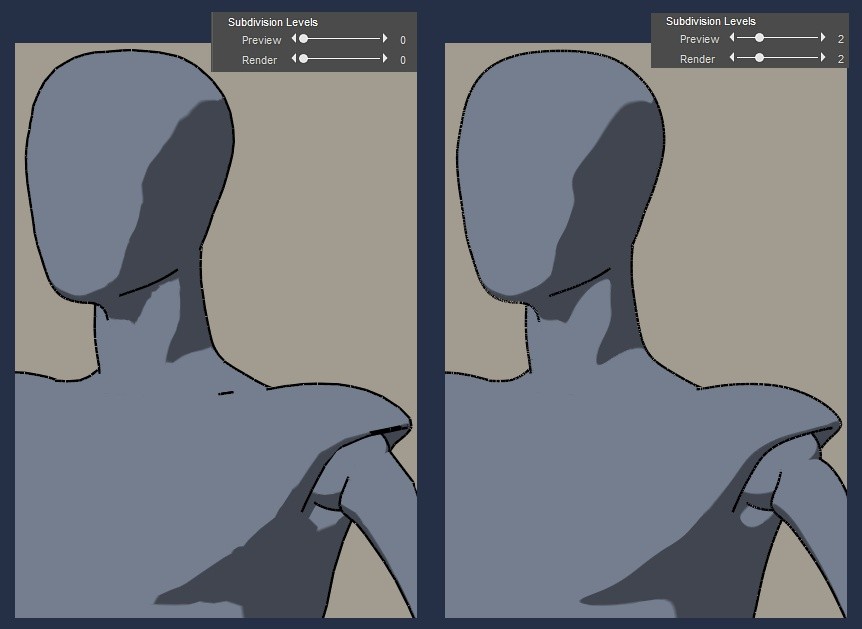
Hint: You can also increase subdivision at this point to get an even cleaner look in some cases. You can see what a difference subdivision made here. This is especially useful for larger renders.
Step 4: Render in Preview Mode
Once you’re happy with your tones and lines, simply render using Preview Mode.
It’s fast, responsive, and perfect for comic workflows where you need dozens — or hundreds — of panels.
There are plenty of ways to chase a toon look in 3D, but Poser stands out because:
No complex shaders required
No external plugins or post‑processing
Instant feedback in the Preview window
Consistent results across figures, props, and scenes
A workflow that feels built for storytellers
For comic artists and graphic novel creators, this means you can focus on composition, storytelling, and character expression — not technical hurdles.
Poser’s OpenGL Cartoon Render gives you a clean, stylized aesthetic with almost no setup. It’s the closest thing to “click → comic” you’ll find in a 3D tool.
Want to Customize Even Further?
And for those of you who love to peek under the hood, Poser gives you room to play. The shading styles you see in Cartoon mode are driven by simple texture maps stored right inside your Poser library. You’ll find them here:
Runtime → Textures → Toon
You can back up that folder and tweak the textures to create your own unique flavor of toon shading — softer, sharper, more graphic, more painterly, whatever suits your storytelling style. It’s a fun way to push the look even further while still enjoying Poser’s famously no‑fuss workflow.
If you’d like a deeper dive into how far this customization can go, check out the excellent tutorial by Charles “Nerd” Taylor. It walks through the possibilities in detail and opens the door to some truly creative results.