.png)

Understanding Poser’s Comic Mode Rendering
Poser includes a dedicated Comic Mode that allows artists to generate stylized, comic‑book or cartoon‑inspired imagery directly within the application. This mode offers a fast, flexible way to achieve ink‑and‑paint aesthetics without relying on external post‑processing tools.
Preparing the Material Setup
Before enabling Comic Mode, it’s important to configure your materials correctly.
The material structure used for Comic Mode is closely related to the setup traditionally used for Firefly’s toon‑style renders.
Building the Core Material Network
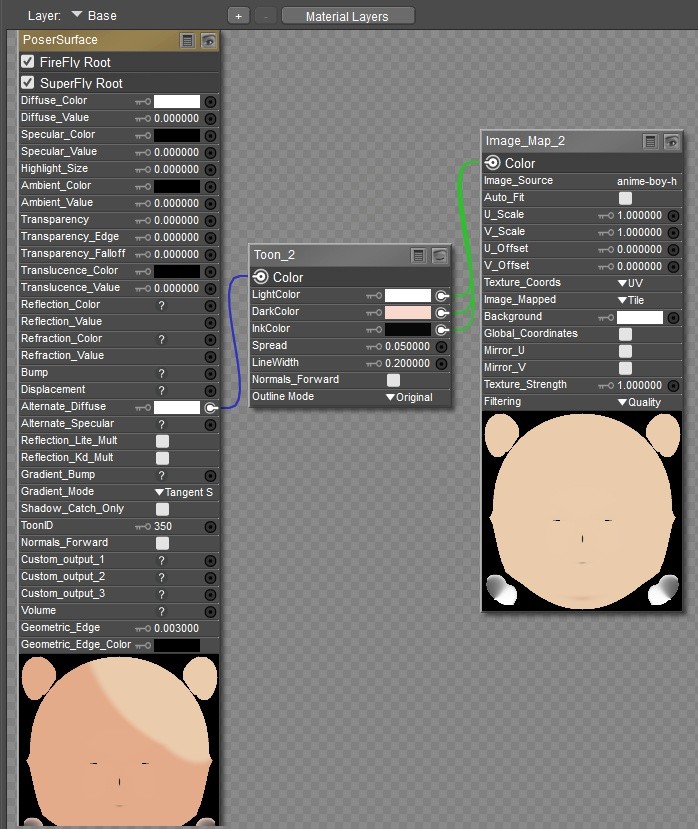
A typical Comic Mode material begins with a PoserSurface root node connected to a Toon node.
When working with textured surfaces, the same texture map is usually connected to all three Toon node inputs.
This forms the foundation for most Comic Mode materials that rely on image maps.
Preparing the Material Setup
Before enabling Comic Mode, it’s important to configure your materials correctly.
The material structure used for Comic Mode is closely related to the setup traditionally used for Firefly’s toon‑style renders.
Building the Core Material Network
A typical Comic Mode material begins with a PoserSurface root node connected to a Toon node.
When working with textured surfaces, the same texture map is usually connected to all three Toon node inputs.
This forms the foundation for most Comic Mode materials that rely on image maps.
Working With Solid‑Color Surfaces
For objects that use flat colors rather than textures, you can place your chosen colors directly inside the Toon node.
The Toon node’s output is then routed into the Alternate Diffuse channel of the PoserSurface root, giving you clean, stylized shading suitable for comic rendering.
For objects that use flat colors rather than textures, you can place your chosen colors directly inside the Toon node.
The Toon node’s output is then routed into the Alternate Diffuse channel of the PoserSurface root, giving you clean, stylized shading suitable for comic rendering.
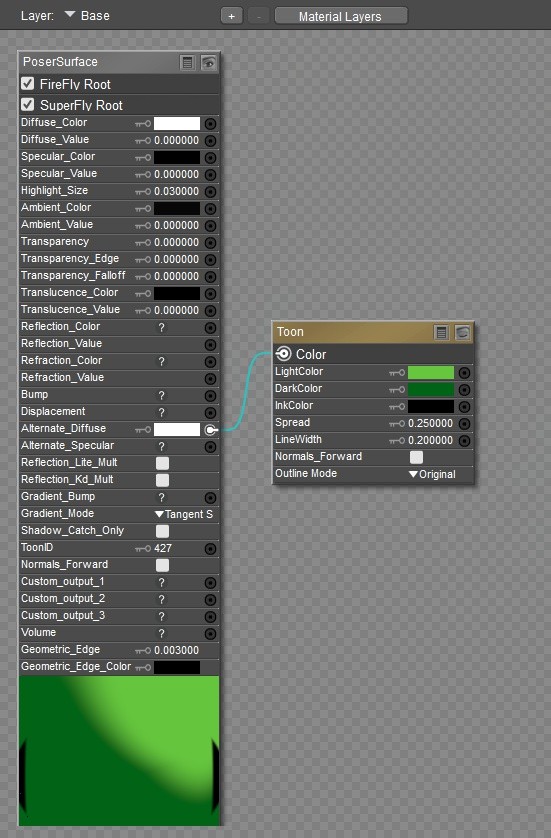
Exploring the Toon Node Controls
The Toon node provides several key parameters that define the final look:
Light Color / Dark Color
These determine the appearance of illuminated and shadowed regions.
Ink Color
This sets the color used for the outline or “inked” portions of the material.
Spread
This controls how sharply the transition occurs between light and shadow.
For a classic ink‑and‑paint style, a low value—around 0.1—creates crisp, graphic shading while higher values soften the effect.
Line Width
This parameter generates a contour line around the object.
In some viewing angles, this line can become overly thick, so it often requires fine‑tuning.
Activating Comic Mode Edge Lines
To achieve more consistent outlines, Poser’s Comic Book Preview options provide an additional set of tools.
Enable Geometric Edge Lines to generate scene‑wide outlines based on object geometry
To achieve more consistent outlines, Poser’s Comic Book Preview options provide an additional set of tools.
Enable Geometric Edge Lines to generate scene‑wide outlines based on object geometry
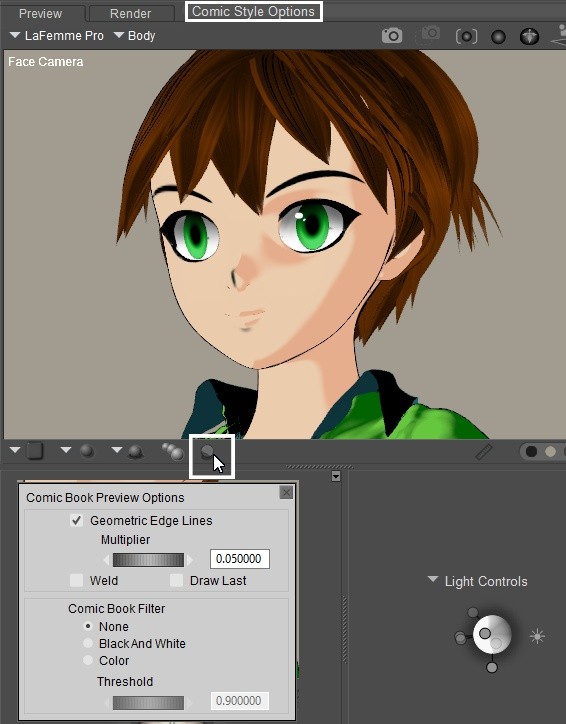
You’ll find two important controls:
Multiplier – adjusts the global thickness of the geometric lines
Weld – helps unify lines along hard edges on geometric shapes (e.g., cubes), reducing gaps
These settings apply to the entire scene rather than individual objects.
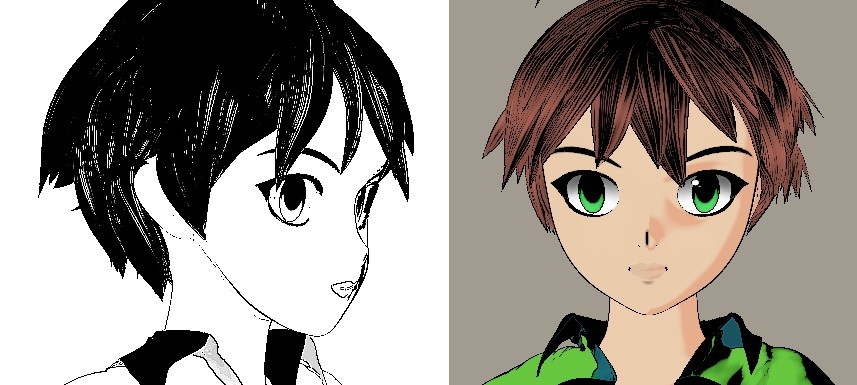
Using the Comic Book Filter
Poser also includes a Comic Book Filter that can apply stylized post‑processing effects.
Switching the filter to Black and White or Color produces hand‑drawn, print‑like variations.
Multiplier – adjusts the global thickness of the geometric lines
Weld – helps unify lines along hard edges on geometric shapes (e.g., cubes), reducing gaps
These settings apply to the entire scene rather than individual objects.
Using the Comic Book Filter
Poser also includes a Comic Book Filter that can apply stylized post‑processing effects.
Switching the filter to Black and White or Color produces hand‑drawn, print‑like variations.
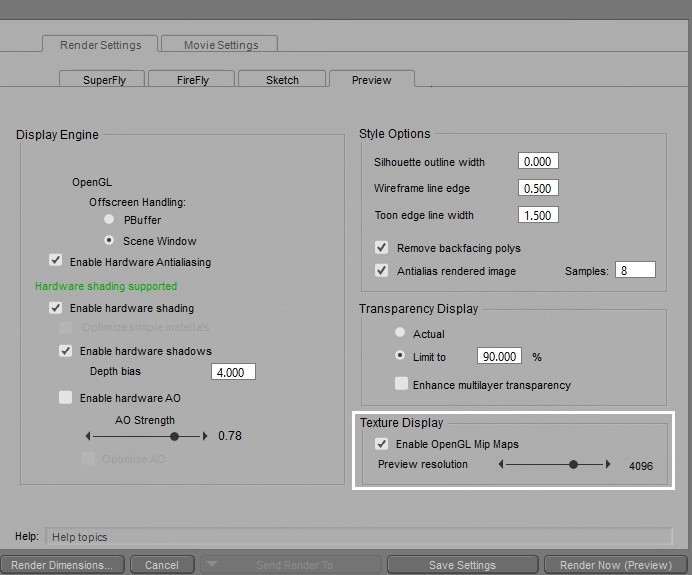
Optimizing Preview Render Quality
Because Comic Mode is a preview‑based rendering system, your preview settings play a major role in the final output.
Switch to Texture Shaded preview mode, then open the Preview tab in the Render Settings.
Set the Display Texture Size to match the resolution of your largest texture map.
This ensures crisp, high‑quality results even though the render is generated from the preview engine.
Choosing the Correct Preview Renderer
Comic Mode works best with the Firefly Preview Renderer.
SuperFly may not display Comic Mode effects accurately, so confirm that Firefly is selected as the preview renderer before continuing.
Want to Customize Even Further?
The limitation of global line settings can be addressed and line width can be refined per material. Further customization includes changing the line color per material to create unique effects. For more details on these and an overview of the whole process, check out the excellent tutorial by Charles “Nerd” Taylor.