.png)
When you’re setting up your renders in Poser, you might notice that some shapes look a little sharp or blocky up close. That’s totally normal in 3D art and depends on the polygon count of the model. The good news is that Poser gives you an easy way to make your figures look more polished, even if you’re brand new to the software.
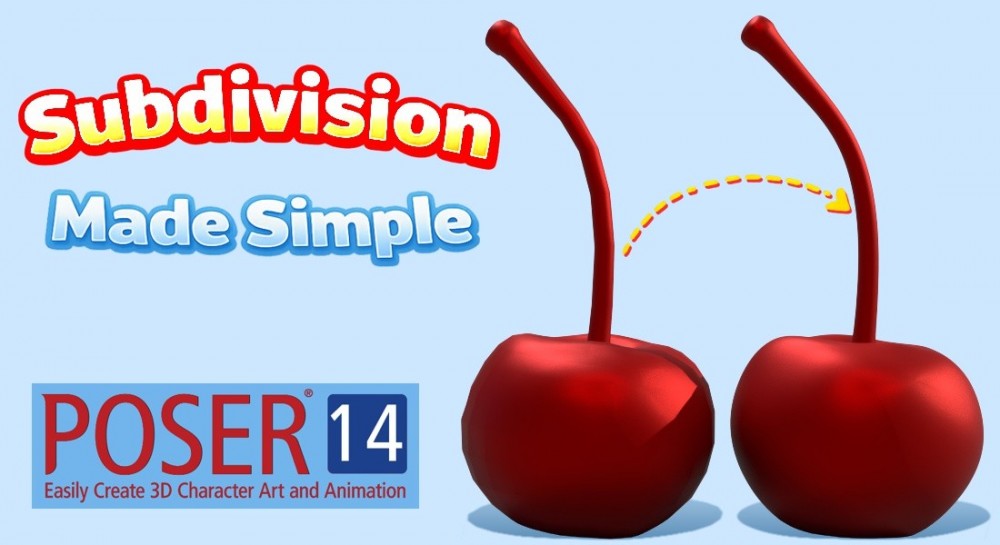
Think of subdivision as Poser’s way of smoothing out a model so it looks cleaner and more detailed, without you having to remodel anything by hand. It can also instantly improve older models and make them look smoother and updated.
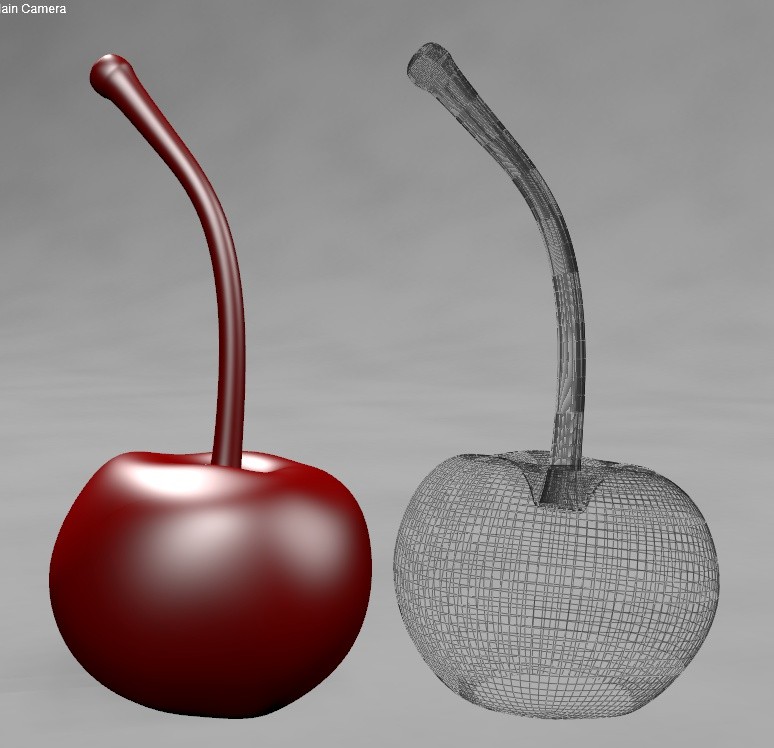
Most 3D models are made what are called polygons. Some have 3 sides, some have 4, (usually referred to as tris or quads) and some have more. Poser can take those shapes and “round them out” by adding extra points and smoothing the surface.
With no subdivision, you see the model exactly as it was built.
Think of subdivision as Poser’s way of smoothing out a model so it looks cleaner and more detailed, without you having to remodel anything by hand. It can also instantly improve older models and make them look smoother and updated.
Most 3D models are made what are called polygons. Some have 3 sides, some have 4, (usually referred to as tris or quads) and some have more. Poser can take those shapes and “round them out” by adding extra points and smoothing the surface.
With no subdivision, you see the model exactly as it was built.
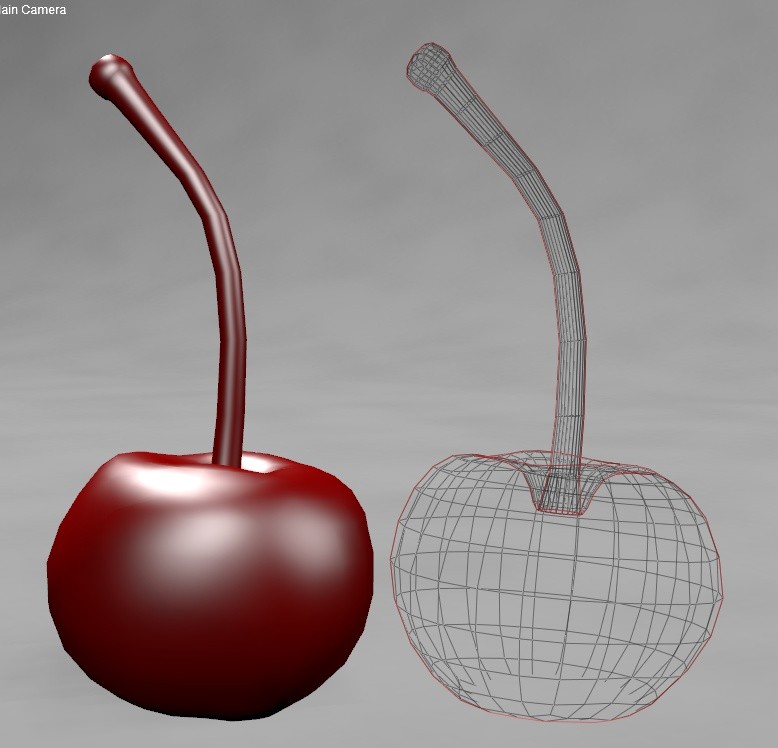
When you turn subdivision up to Level 1, Poser adds extra points inside each polygon and connects them. The model instantly looks smoother, almost like it has more geometry than it really does.
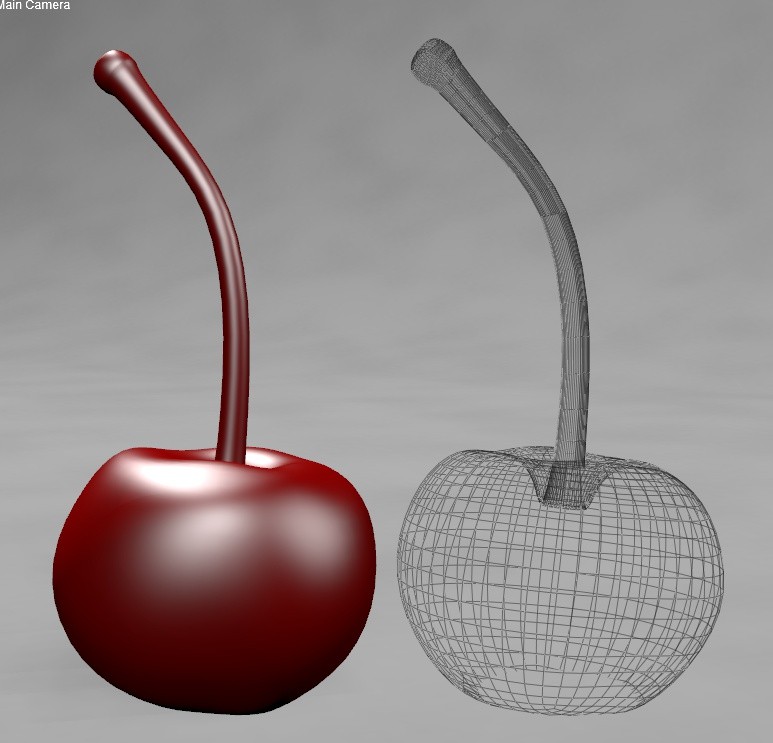
If you go up to Level 2, Poser repeats the process again—now the model looks even smoother because it’s been refined twice.
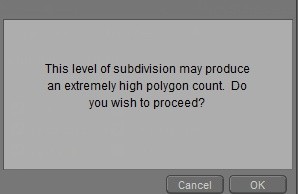
After Level 2 or 3, most models won’t look much different even if you keep increasing the level. At that point, you’re mostly just making your computer work harder for no visible benefit. Poser will let you know when subdividing will increase the workload for your computer by displaying a message.
So the trick is finding the “sweet spot” where your model looks great without slowing down your scene.
So the trick is finding the “sweet spot” where your model looks great without slowing down your scene.
Here’s an easy step‑by‑step guide on subdividing in Poser.
Load your figure or prop into Poser.
Load your figure or prop into Poser.
If it's a poseable figure go to:
Figure → Skinning Method → Poser Unimesh
This merges everything into one smooth mesh so subdivision works properly.

Select the BODY of the figure and go to the Properties tab. You’ll see two sliders:
Preview — how smooth it looks while you’re working
Render — how smooth it will be in the final image.
Preview — how smooth it looks while you’re working
Render — how smooth it will be in the final image.
If you're working with a prop then you don't need to select a skinning method and can just skip to the Properties tab.
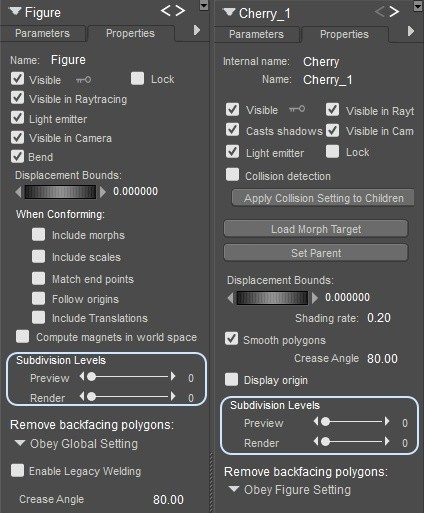
Both start at 0 (no smoothing).
Increase Preview first to see what you like. If Preview goes higher than Render, Poser will bump Render up automatically.
Once you’re happy with the final Render level, you can lower Preview again to keep your scene running fast.
This is especially useful if you’re working with cloth simulations as you'll find that a bit of subdivision can help with removing unnatural creases, smoothing and making the fabric look nicer. For even further correction, cloth simulations benefit from the Morphing Tool as well but we'll delve into that in another tutorial.

Subdivision is one of those features that instantly makes your characters and props look more polished—especially if you’re using Poser 13 or 14, where the smoothing tools are fast, reliable, and beginner‑friendly. You don’t need to be a modeler or a tech expert to just slide a couple of settings and enjoy the upgrade. For a more detailed overview on subdivision and how it works make sure to refer to the Poser 14 online documentation HERE.
If you want cleaner renders, smoother characters, and fewer distracting edges, subdivision is one of the quickest wins in Poser. And if you’re thinking of upgrading or grabbing a new license, Poser 13 and 14 handle subdivision beautifully and are definitely worth it when you want your scenes to look their best.
If you want cleaner renders, smoother characters, and fewer distracting edges, subdivision is one of the quickest wins in Poser. And if you’re thinking of upgrading or grabbing a new license, Poser 13 and 14 handle subdivision beautifully and are definitely worth it when you want your scenes to look their best.