.png)

Creating a Gobo Projection with Spot Lights
If you’ve ever wanted your digital lighting to behave like a tiny
projector and have it cast shapes, patterns, or even full images, then you’re
looking for a Gobo. In Poser, a Gobo lets a spotlight shine through a
texture so the light carries that image into your scene.
It’s a simple
technique, but it opens the door to dramatic lighting effects, from
patterned shadows to stylized illumination. Poser has always supported
Gobo projections in FireFly renders but now support has been added for
the SuperFly rendering engine and the results are amazing!
This guide walks you through the process step‑by‑step, explains why certain settings matter, and helps you understand how to control the final look.
What is a Gobo?
This guide walks you through the process step‑by‑step, explains why certain settings matter, and helps you understand how to control the final look.
What is a Gobo?
A Gobo is essentially a mask placed in front of a spotlight. Instead of emitting plain light, the spotlight projects whatever image or 2D texture you feed into it. Think of it like slipping a stencil or slide into a projector and your light now has personality!
A few important notes before you begin
Gobos only work with spot lights. Other light types can technically accept an image, but they won’t produce meaningful results.
Keep in mind that you won’t see the Gobo effect in the OpenGL preview. You must render the scene to view the projection.
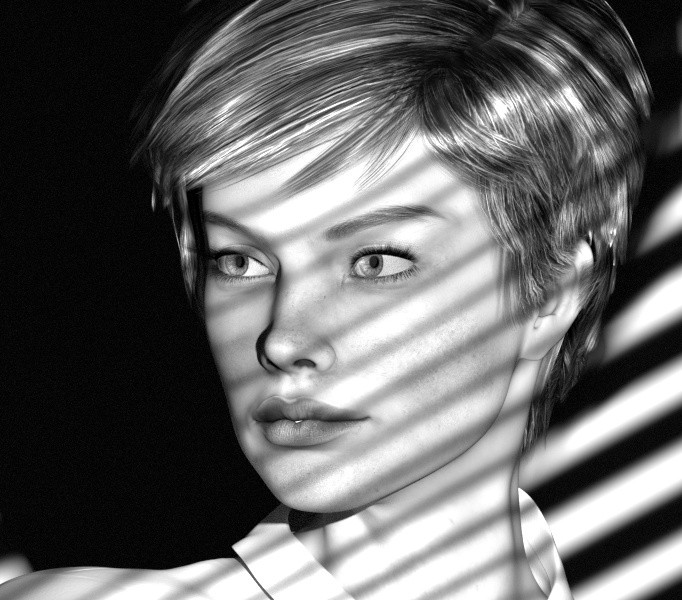
Follow these easy steps to create a Gobo effect.
Step 1: Choose and Prepare Your Spot Light
Start by selecting a Spot Light in your scene. The Gobo effect depends entirely on this light type, so make sure you’re working with the correct one.
Once selected, head into the Material Room and switch to the Edit tab. This is where you’ll access the light’s advanced material settings.
Once selected, head into the Material Room and switch to the Edit tab. This is where you’ll access the light’s advanced material settings.
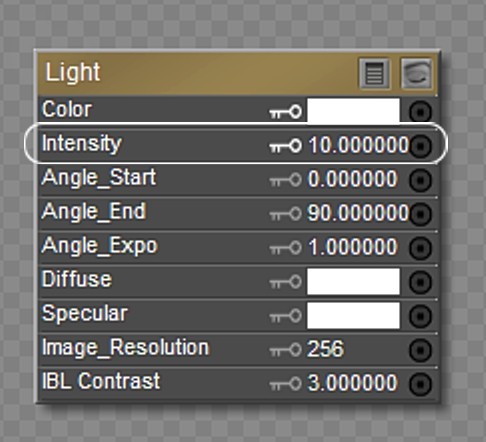
Be sure to increase the Intensity of the light. A setting of 10 is recommended to start with so you can see the effects but you can adjust this as required.
Step 2: Add Your Image or Texture
You can use almost any 2D source such as a photo, a graphic design, a 2D procedural texture (3D procedural textures can be connected too, but they usually produce wild, abstract results).
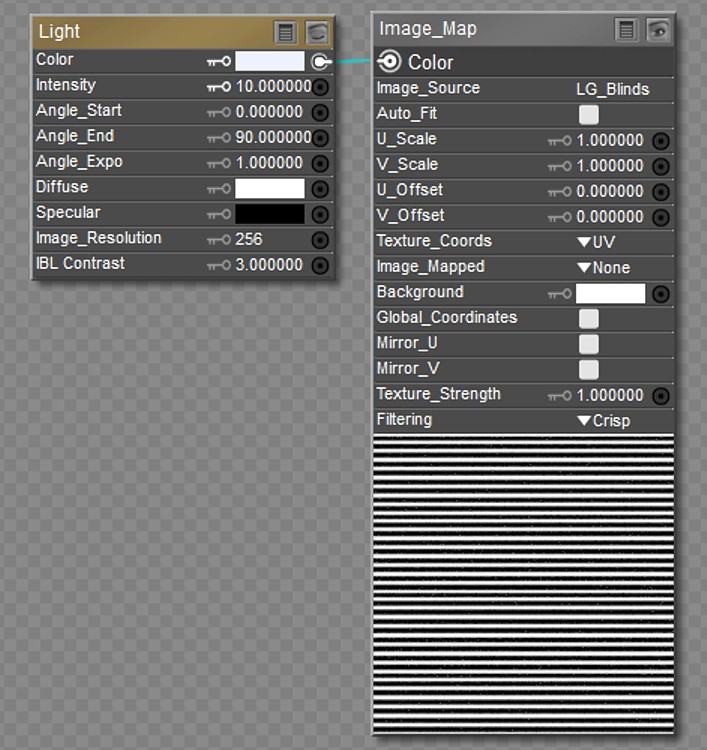
To add your image quickly and easily all you need to do is drag your chosen image directly into the Edit tab. Poser will automatically create an Image Map node for you.
Locate the Color output on the Image Map node and connect it to the Color input of the spotlight’s root node.
Once connected, don’t worry if nothing changes in the preview. That’s expected as Gobo effects only appear in the final render.
You can use almost any 2D source such as a photo, a graphic design, a 2D procedural texture (3D procedural textures can be connected too, but they usually produce wild, abstract results).
To add your image quickly and easily all you need to do is drag your chosen image directly into the Edit tab. Poser will automatically create an Image Map node for you.
Locate the Color output on the Image Map node and connect it to the Color input of the spotlight’s root node.
Once connected, don’t worry if nothing changes in the preview. That’s expected as Gobo effects only appear in the final render.
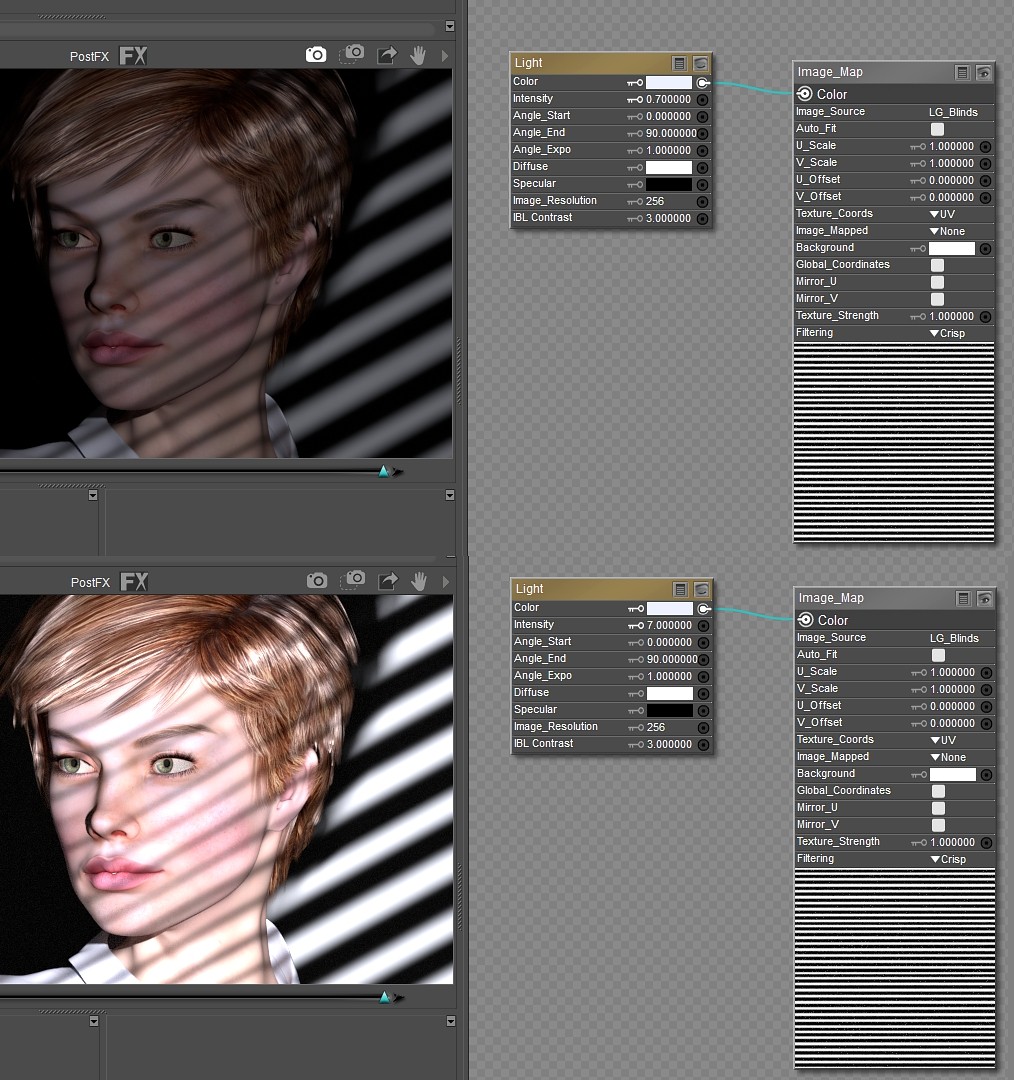
Now you can do some test renders and adjust the intensity to your liking. Create different moods by increasing or decreasing how much light you want to illuminate your subject and background. Here are two examples, one at an intensity of 0.7 and one at 7.0.
Step 3: Control the Sharpness of the Projection
The clarity of your projected image depends on the scale of the spotlight. This setting acts like a focus control.
Small scale values will yield crisp, sharp projection whereas large scale values result in a soft, blurred projection
Think of it as adjusting the focus ring on a camera lens so that a tight focus gives you clean edges, while a looser focus softens everything.
The clarity of your projected image depends on the scale of the spotlight. This setting acts like a focus control.
Small scale values will yield crisp, sharp projection whereas large scale values result in a soft, blurred projection
Think of it as adjusting the focus ring on a camera lens so that a tight focus gives you clean edges, while a looser focus softens everything.
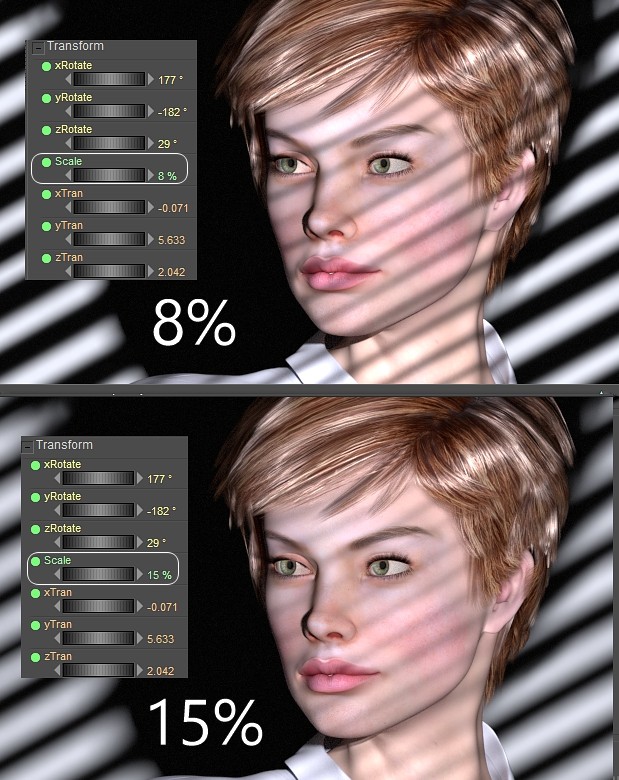
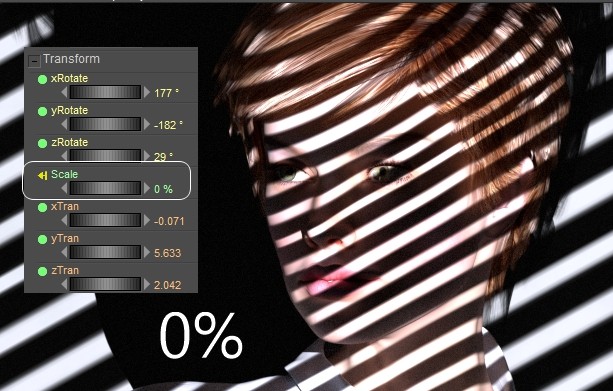
If you want a razor‑sharp Gobo, you can even set the scale to zero.
This same scale also influences how sharp or soft the shadows appear.
Step 4: Adjust the Projection’s Shape and Orientation
Several spotlight parameters influence how your Gobo appears in the scene.
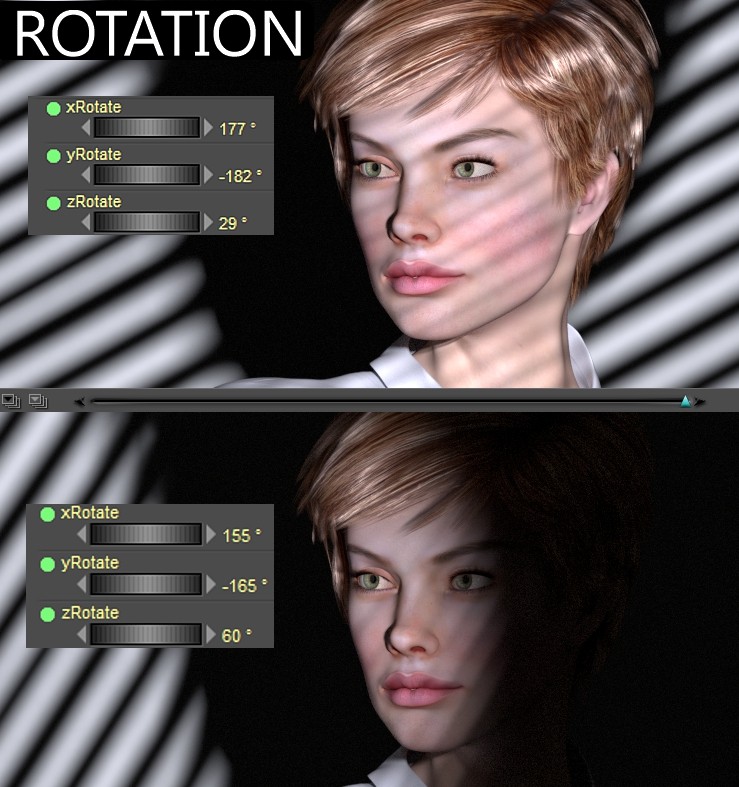
Rotation
Turning the light rotates the projected image, just like rotating a slide in a projector.
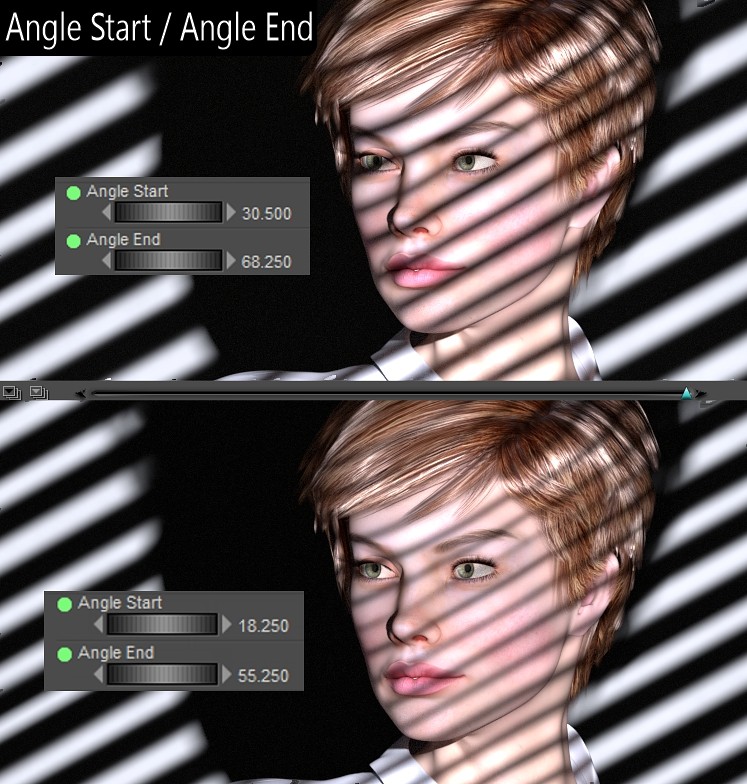
Angle Start / Angle End
These values determine the spotlight’s spread.
A wider angle produces a larger projection, whereas a narrower angle tightens the beam.
Several spotlight parameters influence how your Gobo appears in the scene.
Rotation
Turning the light rotates the projected image, just like rotating a slide in a projector.
Angle Start / Angle End
These values determine the spotlight’s spread.
A wider angle produces a larger projection, whereas a narrower angle tightens the beam.
Together, these controls let you position, size, and orient your Gobo exactly where you want it.
Final Tips for Great Gobo Results
Test render often to check your progress since the effect can't be seen in preview mode.
Experiment with different images and you'll find that high‑contrast designs often produce striking results.
Try combining Gobo lights with atmospheric effects (like fog) for dramatic volumetric projections.
Test render often to check your progress since the effect can't be seen in preview mode.
Experiment with different images and you'll find that high‑contrast designs often produce striking results.
Try combining Gobo lights with atmospheric effects (like fog) for dramatic volumetric projections.
Go bold and add color to your light or a gobo image with color.
Keep an eye on your light’s scale because this single parameter has a huge impact on the final look.
Keep an eye on your light’s scale because this single parameter has a huge impact on the final look.
Stay tuned as we take a look at some of these more creative uses of Gobos - coming soon!