The Material Room
Poser’s Material room is a very powerful tool for creating and editing procedural shaders for the content in your scene. The Material room is designed from the ground up to provide the ultimate in power, flexibility, and ease of use by artists and animators. You don’t need to be a programmer! The Material room gives you ultimate control over the appearance of your Poser scenes.
The Material room allows you to describe the material properties of your objects’ surfaces by giving you full control over every aspect of shading a surface, from the surface color to complex lighting interactions.
In this chapter we will explore the Material room’s basic building blocks. For a more detailed look at working with shaders and nodes in the Material room, please refer to Working with Nodes and Root Nodes.
Access the Material room by clicking the Material room tab at the top of the Poser workspace. The Material room appears as follows.
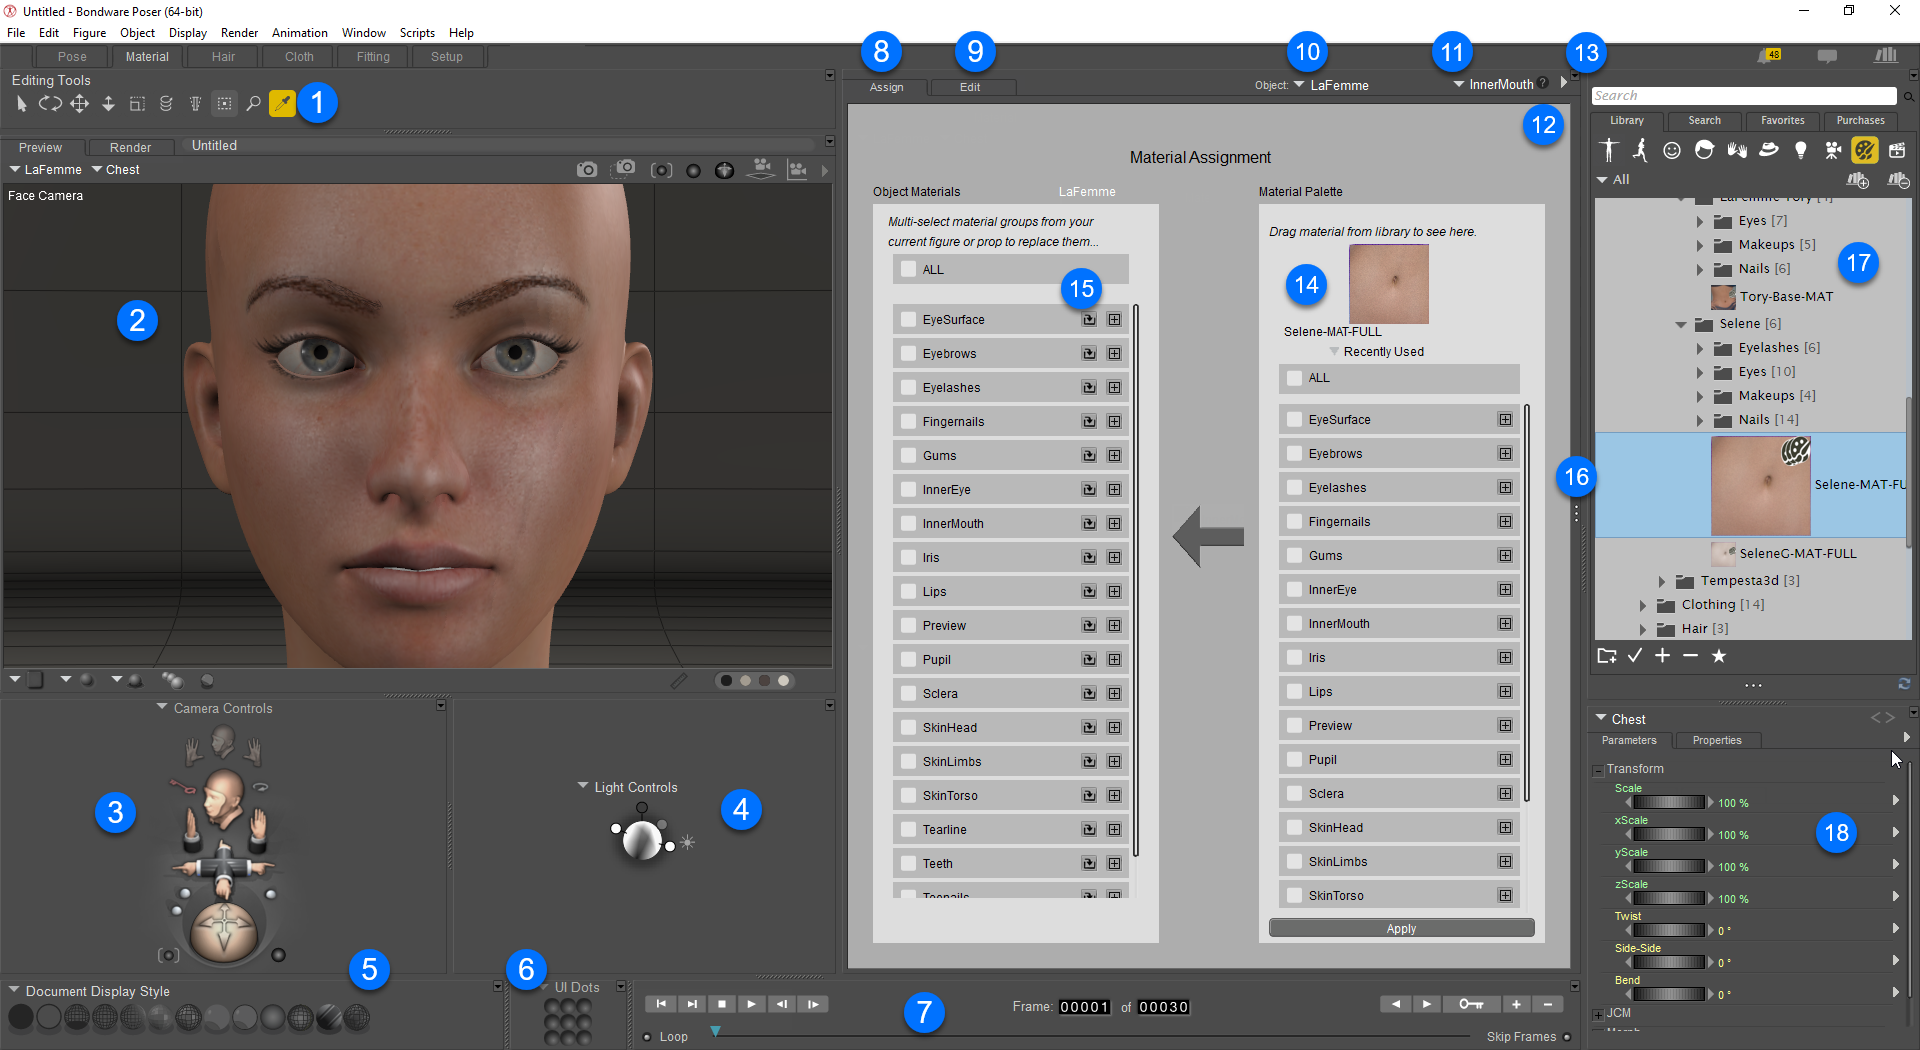
The Material room.
The number of palettes and options that you see in each room depends upon your screen resolution. At higher resolutions, the default workspaces display more palettes, while at lower resolutions you see fewer palettes:
The Material room offers two options for working with surface materials: the Assign view and the Edit view tabs. By default, the Assign view of the Material room is displayed when you first start up Poser. This allows new users to get familiar with assigning Materials before diving into the Advanced settings of the Material room.
Poser’s Material room contains the following items at 1280 x 960 resolution. Less items will appear at lower resolutions, and more options will appear at higher resolutions.
- Eyedropper Tool: The Eyedropper tool appears with the Editing tools. Enabling it and clicking an object in your scene opens that object’s shader tree for editing in the Shader window.
- Document Window: Please refer to The Document Window for information about the Document.
- Camera Controls: Please refer to Camera Controls.
- Light Controls: Please refer to Lighting for information about the Light controls.
- Document Display Styles: Allows you to select one of several different display styles for the elements in your scene. See The Display Controls and Menu for more information about the various display styles.
- Pose, UI and Camera Dots: Allows you to store figure poses, user interface settings, and camera settings for retrieval at any time until you close your Poser document. See Memory Dots .
- Animation Controls: Please refer to Using the Animation Controls for information about the Animation controls.
- Assign Tab: Click this tab to use the Assign view to copy properties from a library material or material collection to the currently selected object. For more information, see Assign View.
- Edit Tab: Click this tab to edit or create advanced shaders that you can apply to your objects or save to the library. Shaders consist of a root node and as many connected nodes as you need to create a specific type of material. Please refer to Working with Nodes and Root Nodes for more information about working with shaders and nodes.
- Object selection: Click the down arrow to select one of the objects in your scene.
- Current Material List: The Current Materials list displays all of the material groups in the currently selected object. Poser organizes materials by figure/prop, thereby avoiding confusion when assigning materials and allowing you to, for example, assign different eye or skin colors to each figure.
- Material Room Help: The (?) icon at the top right of the Shader window opens the Material room Help document. This HTML document contains information about using nodes and shaders to define surface material attributes.
- Options pop-up menu: The Options pop-up menu is available from the Advanced tab of the Shader window, allows you to add, cut, copy, paste, select, and deselect nodes. For convenience, this can be also accessed by right-clicking within the Advanced tab.
- Material Palette: Drag a material or material collection from the library and drop it into the preview thumbnail area. A list of the materials will appear and you can select all or some of the different material zones to transfer to your selected object.
- Object Materials: Displays a list of materials in your currently selected object.
- Wacro Drawer Widget: The Wacro Drawer is typically hidden. Click the Wacro Drawer widget to expand the drawer. The Wacros allow you to select from many predefined shortcuts that cover various material setup tasks. For more information about the Wacro Drawer, please refer to Wacros .
- Library: The Library window appears in the far left section of the Material room if space permits. See The Poser Library.
- Parameters/Properties palette: Please refer to The Parameters/Properties Palette for information about the Parameters/Properties palette.