The Edit Tab
The Edit tab of the Morph Editor allows you to select and modify the mesh vertices to create new morph targets on a single body part or across joint seams to adjacent body parts. As with the Combine tab, you can apply the Edit tab functionality to any scene object that has a mesh.
Deformations made to the mesh while using the Edit tab can apply to the currently selected actor or to the entire figure. A parameter dial will appear only on body parts that are affected by the morph brush.
In addition to creating morph targets for individual actors, Poser also allows you to create Full-Body Morphs (FBMs). For more information about Full-Body Morphs, see Creating Full-Body Morphs.
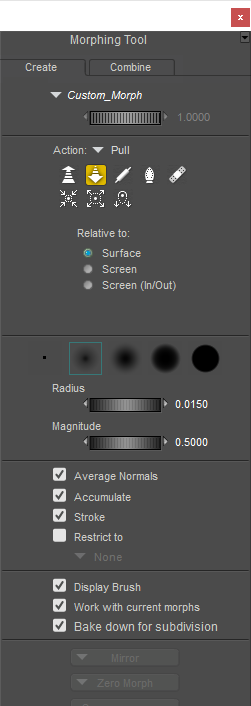
Morphing Tool Edit Tab.
To use the Edit tab:
- Switch to the Edit tab in the Morphing Tool if necessary.
- The morph tools in Poser’s Edit tab will initially be disabled. You will be prompted to select an existing morph or to create a new morph, after which the tools will be enabled
- To select an existing morph, click the arrow beside Select or Create Morph, and choose the morph that you want to modify. In the case of characters, you can choose between body (full body) morphs, or on individual body parts.
- To create a new morph, select New. You will be prompted to assign a name for the new morph. You will also be prompted to check or uncheck an option to apply the morph before joint rotation. For more information about this feature, see Applying Pre-Transform Morphs.
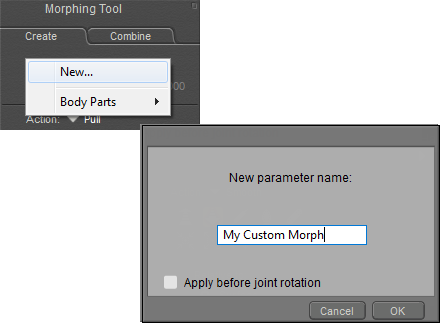
Choose New from the Custom Morph menu to create a new original morph.
You can also use the morph menu in Poser’s Parameters Palette to edit an existing morph. Click the arrow that appears to the right of the morph that you want to edit, and choose Edit Morph from the context menu. The morph palette will open to the Edit tab, with the morph pre-selected for editing
- After you name your new morph or select an existing morph, the name of the morph will appear at the top of the Edit tab. Set the value of the morph to 1 to begin editing.
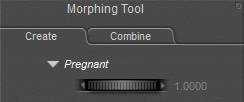
Set the value of the morph to 1 while you are editing.
- Click the icon for the action you wish to use to modify the vertices: Push, Pull, Flatten, Smooth or Restore. You can also choose one of the modes from the Action menu that appears just above the icons.
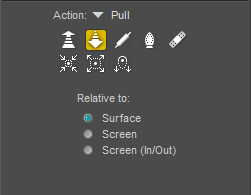
Vertex modification options in the Edit tab.
- Push: Selecting Push will enable you to push the vertices in the impact region inward from the original surface of the mesh, to create a concavity such as a dimple or a dent.
- Pull: Selecting Pull will enable you to pull the vertices in the impact region outward from the original surface of the mesh. This task is very useful for cleaning up any inappropriate intersections between the figure and either conforming or dynamic clothing; you can select a region of the cloth, and simply pull it out past the point of intersection with the figure.
- Rotate: With the Rotate tool, you can rotate or “twist” underlying vertices.
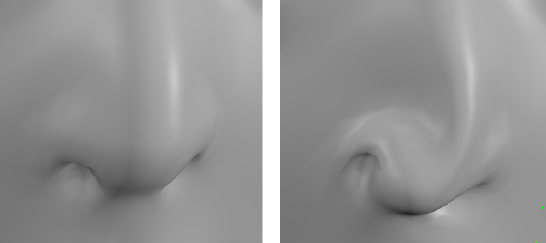
Using Rotate brush. Before (left) and After (right).
- Flatten: Takes all of the affected points and averages the plane that best fits through all those points. It then pushes all of the points to match that plane.
The following image shows an irregularly shaped object in three stages: The top image shows the object before it is flattened with the morph tool. The middle image shows the object after a couple of areas have been flattened with the Morph tool. The brush shape used no falloff (the last brush option) and was set to a large size. The third image shows the object after changing the Morph brush to Smooth, and then passed through the rough areas in the center.
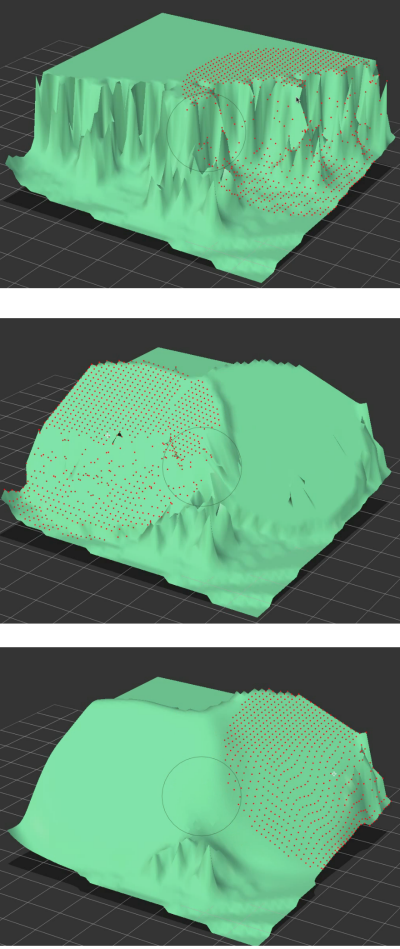
An irregularly shaped object (top); after flattening (middle) and then smoothed (bottom).
- Smooth: With the Smooth option you can gradually reduce the amount of variation in the surface mesh, to create a smoother surface. This is particularly useful for surfaces with high frequency variations. Keep in mind that this option generally reduces definition.
- Restore: The Restore option gradually reverts your recent changes back towards the original unmorphed geometry state. This feature can be extremely useful in fine-tuning your modifications, as it allows you to back up recent changes by gradual degrees.
Restore is not the same as Undo. If you make a change, and then select Edit > Undo, your entire change will be erased, and the mesh will revert to the state it was in before you made the change. By using Restore, you can revert the effects of your change gradually, thus allowing you to edit your modification without losing it completely.
- Tighten Fit, Loosen Fit, and Sag: See Using the Fitting Tools.
- Select the mode in which you wish to work: Relative to Surface, Screen, or Screen (In/Out).
- Surface: When in Surface mode, all modifications you make to the mesh will be made along the direction of the surface normal. This is the default mode, as you are likely to want to sculpt in relation to the surface normal direction for most purposes.
- Screen: Screen mode allows you to deform the mesh in any direction you wish. This option is useful for situations when you may wish to sculpt the mesh in a transverse or vertical direction. Please note that the direction of the modification in Screen mode is determined by the current view of the figure as relative to the screen. For example, if you wish to deform the mesh towards the camera, you should rotate the figure ninety degrees, then make your modification by moving your mouse to the side.
- Screen (In/Out): Deforms the mesh relative to the screen, moving the vertices toward or away from you.
- Select your desired brush style from the five circular brush style icons. Poser’s morph target creation feature uses a brush paradigm, which allows for varying degrees of precision when applying your modifications to the mesh. The left most brush style impacts only the closest single vertex to your mouse pointer, thus allowing for a great deal of precise control. The remaining brush styles all affect a region of the mesh. These regional brush styles have varying degrees of falloff; the modification will affect vertices within the impacted region to differing degrees, as determined by the falloff. For example, the second brush style from the left has a large falloff region, which means that while vertices at the center of the region will be strongly impacted by your modifications, the impact will decrease gradually over most of the other vertices within the impact region. The falloff area decreases with the next two brush styles, and the right-most brush style has zero falloff, so that all vertices within the region are impacted equally.
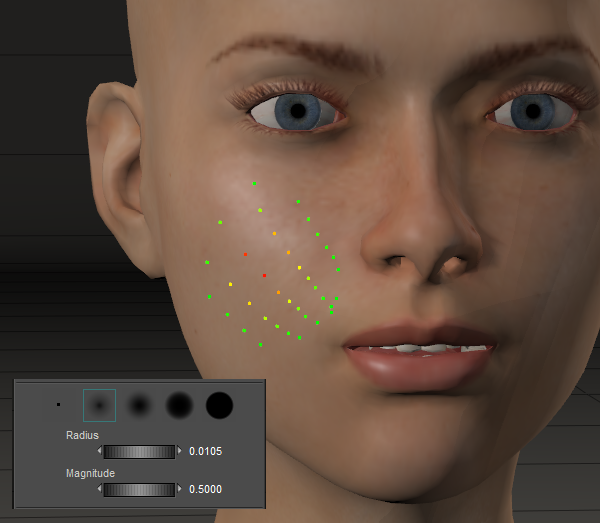
Enabling the Display Brush option in the lower portion of the Edit tab will display a visual preview of the impact region. This preview is color coded to show the falloff effect: red indicates the area most strongly affected, yellow indicates less effect, and areas shown in green are the least affected within the impact region.
- Adjust the Radius dial to increase or decrease the size of the impact region. If you have enabled the Display Brush option, the visual preview will adjust automatically to indicate the current impact region radius.
You can also use the Left or Right arrow keys to adjust the radius of the brush.
Adjusting the size of the Morph Brush.
- You may want to adjust the Magnitude dial to specify how much effect the Morphing Tool will have within the impact region. A high Magnitude setting will allow you to make large-scale dramatic changes, for faster workflow. A low Magnitude setting will allow you to make more precise, focused changes.
You can also use the Up or Down arrow keys to adjust the magnitude of the brush.

Radius and Magnitude settings control the size and strength of the Morph Brush.
We recommend that you start with a relatively low Magnitude setting to allow you to become accustomed to the Morphing Tool, and then gradually increase the Magnitude as needed.
- By default, the Morphing Tool allows you to morph across multiple body parts. You can also restrict painting by group(s) or material(s). To do so, check the Restrict To option and expand the menu to select the group or material that you want to include in the restriction. You can repeat this to include more than one item in the restriction.
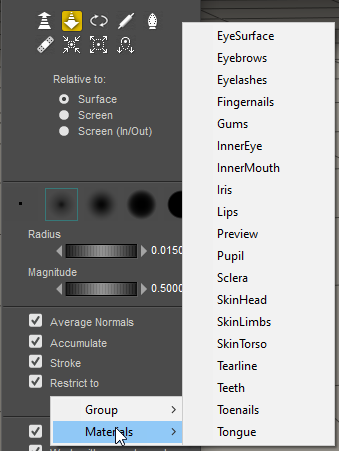
You can limit changes to group(s) or material(s) with the Restrict To options.
- Enable or disable the following options to suit your requirements:
- Average normals: Maintains more detail of the underlying surface when Relative to Surface is selected. It averages the normals of all the effected vertices, instead of moving each affected vertex along its own normal.
- Accumulate: When Accumulate is enabled (checked), your change will continue to accumulate so long as you continue a single click-and-drag movement. This option allows you to make a greater degree of change with a single motion, but with less precision. When the Accumulate option is disabled (unchecked), each modification requires a separate click-and-drag operation. Use this setting for greater control over your modifications.
- Stroke: When the Stroke option is enabled (checked), the Morphing Tool will implement your modifications along the trajectory of your mouse movement. This allows you to “paint” deformations onto the surface of the mesh as you move your mouse across it. When Stroke is disabled, your mouse movements will adjust the degree of the deformation, while the effect of the modification applies to the original impact region only.
- Once you have configured the Morphing Tool to your specific needs via the Edit tab, click and drag directly on the current actor to deform the mesh.
- The Edit tab also contains the following Display options:
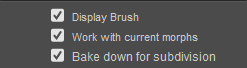
Display options in the Edit tab.
- Display Brush: The Display Brush option displays a visual preview of the region you will be impacting with your deformation. This preview uses different colors to indicate the degree to which each area of the impact region will be affected by your selected action. Specifically, red indicates the area most strongly affected, yellow indicates that an area is less strongly affected, and green areas are the least affected within the impact region. The Display Brush option is enabled by default. If you have elected to work on a single group rather than the entire figure, the brush will display only when it is over the group that is selected for editing.

The Morph Brush appears as multicolored vertices that represent strongest and weakest areas.
- Work With Current Morphs: When enabled, the Work With Current Morphs option allows you to visualize the current adjusted state of all other morph targets while you deform the mesh. This option is useful for creating a morph target that acts on top of another morph target.
This setting is useful for understanding how your new morph target will interact with other existing morph targets.
- When disabled, the Work With Current Morphs option allows you to temporarily hide the effects of all other morph targets while working within the Edit tab. Using this option allows you to work on the mesh geometry in its neutral state, without losing the settings of your other morph targets. If you leave the Edit tab, those morph targets will automatically revert to their specified states.
- Bake down for subdivision: When working on morphs on subdivided figures, this allows any changes made at higher subdivision levels to also work at lower subdivision levels if the lower resolutions support the morph. For more information about subdivided morphs, see Creating Subdivision Level Morphs .
You can use the following functions to save or reset your morph targets:
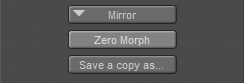
Additional Morphing Tool functions.
- Mirror: The Mirror button at the bottom of the Edit tab brings up a pop-up menu offering six options of different axes and directions for creating symmetrical changes on the currently selected object, for example “-x to x” or “z to -z”. Note that these axes refer to the local coordinate system of the currently selected object only, and are not related to the world space coordinates of your Poser scene. Selecting one of these options will mirror morph target changes from one half of the currently selected object to another half of the same object, as defined by the axis and direction you selected from the menu.
When you morph a body part that spans across the center, the -x to +x and +x to -x options should copy the morph from one side to its opposite side. If you created a morph on a body part that does not span across the center of the figure (such as a right shoulder), use the Right to Left or Left to Right options to copy the morph to the opposite body part.
If the mesh topology of the actor across which you are attempting to mirror is not symmetrical, the mirror feature may not be able to successfully translate your morph target changes.
- Zero Morph: The Zero Morph button will reset the surface mesh to its undeformed state. Zero Morph will also clear any morphing tool changes (stored in the Custom Morph channel) that will generate at each body part and the figure level. If the Zero Morph button has been pushed, the channel will still exist but the morph data is removed. When working on subdivided morphs, you can zero the morph at the current level, or all levels. For more information about subdivided morphs, see Creating Subdivision Level Morphs.
This Custom Morph channel is used as a receptacle for morphing edits with the morphing tool. Save a Copy As is the best way to preserve that Custom Morph data for Full Body or individual body part morphs.
The Zero Morph button only applies to the effects of your new morph target; all other morph target states will remain unchanged. Be sure to save a copy of your modifications before clicking the Zero Morph button if you do not wish to lose your changes.
- Save a Copy As: The Save a Copy As button will allow you to save the current state of the Custom Morph target to a new, separate morph target. You can use Save a Copy As to save incremental modifications as you work with the mesh, or to propagate your final modifications to the figure for future use.
- Full Body Morphs created using the Save a Copy As and the Custom Morph functions are traditional Delta Add morphs with values that change linearly with the a master parameter value. You can edit them using the dependent parameters editor, as mentioned in Using Dependent Parameters. The Save a Copy As morph saves a channel to each body part, and also adds a parameter dial to the Body that drives all of the individual body part channels.
The Custom Morph target is cumulative, in that any modifications you make will be made on top of the previous state of the morph target. Therefore, if you do not save your changes to a separate morph target using the Save a Copy As button, they will become incorporated into any figure changes, and you may have difficulty recovering that previous state.